Why Don’t I Feel Like Sewing?

So it’s been a hot minute but I’m back at 5am (because for some reason that is the golden blogging hour for me!) because the blog is my favourite space to write and think about my sewing journey. In particular I want to talk openly about the fact that right now…I don’t really feel like sewing.

It feels like sacrilege to say because if I can’t or don’t want to sew then what on earth am I meant to talk to all you lovely folks about? Is it maybe more important to show up publicly and say that “I don’t feel like sewing” so that we normalise the fact that for 99% of us, this is not our job! I’ve had lulls in my sewing motivation before and usually all I need to do is tidy my sewing space, go stroke some fabric, and away we go. However this time feels slightly more existential and I think I know why.

All New Patterns Look The Same

So it turns out that it’s not just me! I shared this feeling on YouTube and loads of you responded saying that you’d noticed this as well. In the past 5 years I’ve noticed a shift away from brands having a specific style of patterns and towards patterns that align with high street trends. Look, I get it, sewing patterns can be expensive to make and you want to be sure your pattern will be bought however I think its ridiculous to charge £20-25 for an elasticated tiered dress or a shift dress with nothing else to it? Where are the fun, creative, interesting patterns? Where is the style? I would even take well drafted elevated basics at this point but it just feels like every pattern is the same.

I’m Enjoying My Me Made Wardrobe

This is an important thing to note. We make all these clothes but I think sometimes we forget to actually spend the time to wear them and style them and love them and make them a part of our wardrobe. Although I haven’t been sewing tonnes of clothes, I’ve been having a great time creating capsule wardrobes for trips, styling old garments new ways, and generally just adoring my wardrobe. I don’t want to make things, wear them once “for the gram”, and then never touch them again. That seems insane to me? I want to add pieces to my wardrobe and yes it’s important to note that not everything you make will be a long term addition to your wardrobe, experiments fail and some garments will never get worn again, but I think its important to think about what you want in your wardrobe as well as what you want to sew.

I Need A Challenge

Spending 11 months designing and making my own wedding dress was a challenge. Both mentally and technically it was a true challenge. I drew the design in my croquis book, I adapted and changed pattern pieces until they were unrecognisable, I did 5 different toiles to get the fit perfect. I bias bound seams, covered and hand sewed 36 self covered satin buttons, and built a whole supporting corset from scratch. It was difficult BUT it was incredibly fun! I loved the mental challenge. I loved having to sit and think, “Now how on earth am I going to do that?”. I’ve really noticed the lack of this challenge in my sewing since finishing my wedding dress and I think its time to bring it back.

So…what am I going to do about my general sewing malaise?

More Creative Projects

Making my wedding dress last year showed me that I can take on big design projects and not feel overwhelmed by them. I’m going to start making the garments that pop into my head! One example of this is the top I made for Sabrina Carpenter last week. I had this idea for a floaty 1970’s-inspired top and decided to use the silk that had been languishing in my stash for a couple of years. I sketched it out, chose a pattern as a base (because I’m not up to drafting from scratch just yet!), hacked it to pieces, and behold from the bodice of the Cashmerette Roseclair Wrap Dress I have created this brilliant top (above) and goodness me was that fun. There is another dress that is sticking in my mind that I think is going to require a little more work to bring to life but I am up for the challenge so head over to instagram to see how I get on!

More Small Pattern Companies

I’m going to push the boat out a bit and start trying some small indie pattern companies. I’ve had great success with companies like Size Me Sewing and Cinnamon Daisy in the past and this year I’ve also discovered NH Patterns which has been great. Lots of you have made some suggestions on YouTube that I’m going to look at as well!

I know this isn’t a super positive happy blog but I think it’s important to use this space as I originally intended and chart the reality of my sewing journey. I’ve grown a lot in the past 5 years in this space and I look forward to another 5 at least but its never a bad thing to take stock and think about what I want to be making, why I’m sewing, and what role I see my sewing taking in my life!

Hope you enjoyed this little catch up, I’ll try to be around here more often but you can find me on YouTube weekly (ish) and on Instagram at all times!

Fabric Friday Review: Higgs & Higgs Fabric

It’s been a few years since I’ve written a fabric shop review as frankly I ran out of fabric space so I had to start sewing the fabric from the shops I’d been reviewing. It’s a nice problem to have but not one that is easy to blog about I’ll be honest. However when Higgs & Higgs asked me if I’d like to review their online shop I jumped at the chance because I adore their fabrics! Every single show I go to that Higgs & Higgs is at, I end up buying something. It’s like a compulsion. Their stalls are always beautifully laid out and they always have a good selection of cosy knit fabrics (my winter kryptonite) so honestly it’s a foregone conclusion. What I’m slightly ashamed to say is that I didn’t know they had a website! So lets talk core details:

Higgs & Higgs

  • Online Shop / Physical Shop / Both
  • Web Link: https://higgsandhiggs.com
  • Core Purpose: Dressmaking, Upholstery, Haberdashery
  • Unit of Sale For Fabric: 0.5m / 1m / 2m / custom amount

Now let’s get the difficult bit out of the way, yes Higgs & Higgs have asked me to review them and they have sent me some fabric of my choosing. However*, as always all views are my own. Whether I’m sent fabric or a sewing machine to review I will always be 100% honest. I also do freelance website improvement reviews for fabric shops that are not published on here so you’d best believe I will always be honest about my experience. So ‘how will this review work if you’ve already been sent the fabric?’ I hear you cry, well it’s going to work like this. I get to pick the fabric so it will be the standard approach I take to web fabric shopping. I will go through the whole website, try to find fabrics I want, go through the selection to put them in my basket to see how that works, I will report on pricing, delivery, etc as normal, and then once they send me the fabric I’ll report on delivery, quality, packaging etc. So basically, I’ll do what I always do, it’s just on this occasion very kindly Higgs + Higgs will have gifted me the fabric.

Fabric Types

Higgs + Higgs stock a brilliant range of fabrics for dressmaking, upholstery, and quilting, plus they stock bias-binding and haberdashery so they make a great one stop shop. In terms of price the most affordable fabrics are as you would expect the cottons at £6.99pm with the upper end at £27/28pm for wools. In terms of fabric shops generally I would say they are middle ground in terms of affordability across their range of fabrics and we should also note that the quality of the fabric is reflected in the price.

This time I had a specific project in mind so choosing my fabric was really challenging because there are so many good autumnal fabrics. You all know I love a knit but on the other hand I’ve been wanting a white/cream denim midi skirt as a transitional piece. So my core choices were either the Luxe Faux Angora Cable Knit in Black or the Snow White 7oz Stretch Denim. In the end I decided as we are heading into Autumn/Winter I wanted to go cosy and chose the Black Luxe Faux Angora Cable Knit to make something I could wear in the office or at home. Although on this occasion my fabric was gifted I did see the payment process through to give it a test. Overall its what you’d expect from a payment system, I like that it’s integrated with Apple Pay for a speedier checkout, and unlike a lot of other websites the discount code box is obvious and the interface is clean and simple to use.

Overall the fabric buying process is very smooth. I like the standard measurements of 0.5m, 1m, 2m, as well as a custom option for the length you would like. The minimum is 0.5m but you can buy fabric 10cm at a time. There are a nice selection of capsule wardrobe patterns and a well-stocked haberdashery. In terms of delivery it’s £3.50 for orders under £50 and free delivery over £50 and it’s a pretty speedy 2-3 day. Not the most expensive delivery, particularly post-covid where I know courier prices have skyrocketed, but worth bearing in mind. My fabric arrived in less than 48 hours, it was well packaged, and arrived in great condition. Given the breadth of fabrics I’d recommend getting your moneys worth on free delivery and buying your bulkier autumnal and winter fabrics in one session.

Website Design & Functionality

The website is easy to use, the refresh and page load rate is really good. Why does this matter? Because when you have 15 tabs open of different fabrics it means that website still loads quickly which makes fabric shopping that bit easier. The only slight irritation I would note is that the side menu isn’t optimised which would be a good thing to fix to make navigation even easier. There are a couple of broken links but that is fairly common for websites with a high number of fabric types that change regularly. However that being said, I really like the search functionality from the top bar and its clear that effort has been put into the web design to ensure its easy to browse the full catalogue of fabrics while also being able to break down into sub-genres of fabric type and even patterned or plain within those typologies. They stock so many types of fabric that being able to search in this detail is a godsend.

When scrolling for fabric, you can filter by price or popularity which is helpful. I also love the detail on every listing with fabric information, good photo quality – and yes I partially wanted to get black fabric to see how the photo matched the reality – this is a review after all. Each fabric landing page has suggestions for what you could use it to make and there are not only detailed fabric composition stats but there are also washing instructions which is brilliant and greatly appreciated. Particularly for this upcoming project as I’ll be working with a faux Angora knit that I do not want to ruin it by accident!

So you guys know the score or you will in a second! Let’s do the round-up.

Review Score:

  • Range of Fabrics: 9
  • Cost: 7
  • Delivery (Speed/Cost): 7
  • Ease of use: 8
  • Ease of payment: 9

Total Average Score: 8/10

Overall I am impressed with Higgs & Higgs, they are an excellent one stop shop and I look forward to visiting them in person next time I’m over that way. I like the range of fabrics, I particularly like their new quilted fabrics which would make an amazing Pogonip Pullover or a Megan Nielsen Hovea Coat, and I love the amount of effort they put into telling you about each fabric. Head over to their website to have a nosy at their stock and if you are ever at one of the sewing shows look them up and see for yourself! I never leave without at least one new knitted fabric.

2 Months To Go: Reflections On Sewing My Wedding Dress

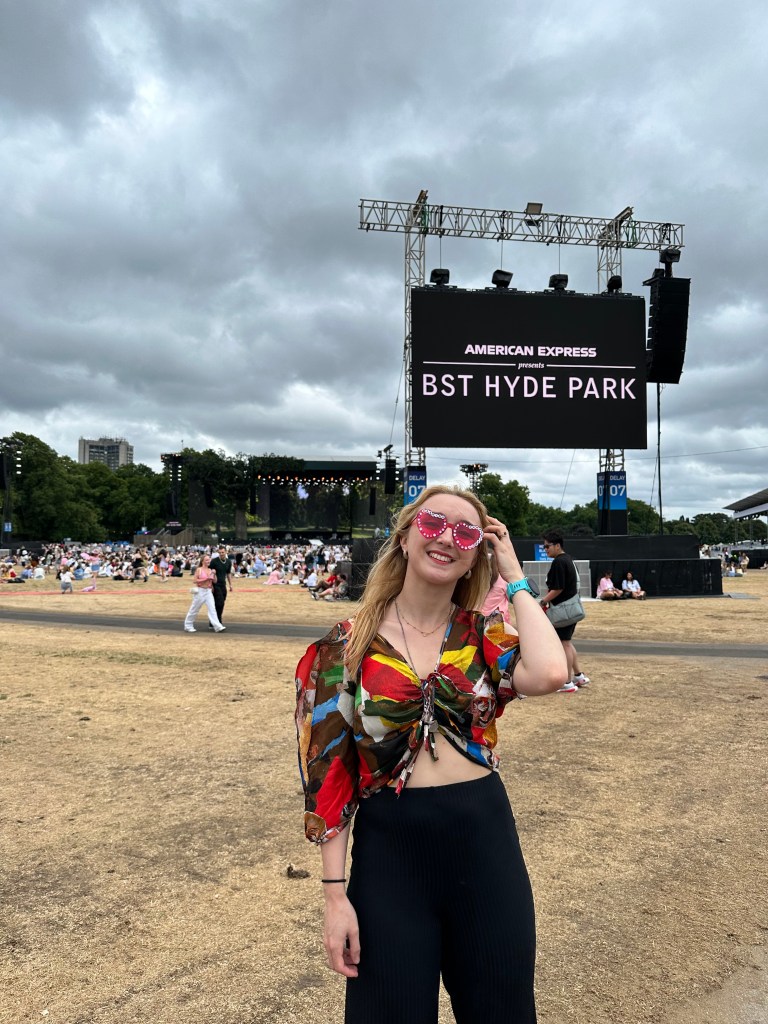
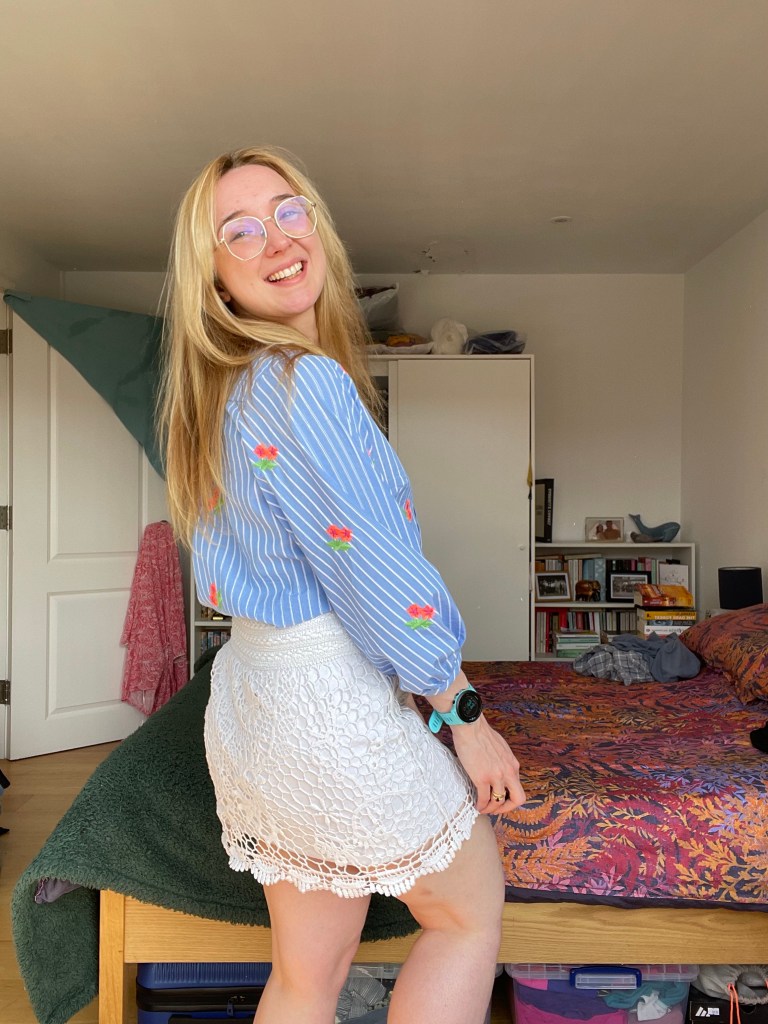
Did I take a 9 month break from the blog intentionally? No. In fact, I don’t think I ever really announced this on the blog but I am getting married this year! Alongside the PhD, PTVL teaching, my other job as an Analyst, the podcast, sewing, running, and everything else, I decided to sew my own wedding dress. Hubris right? Well not only that but in fact I am sewing;

  • My Wedding Dress
  • My Evening Wedding Dress (I can’t dance in a long dress, I will fall over! Plus this can be worn in the future more easily!)
  • Four Bridesmaids Dresses
  • Four Ties For Groomsmen
  • A Shirt For Adam

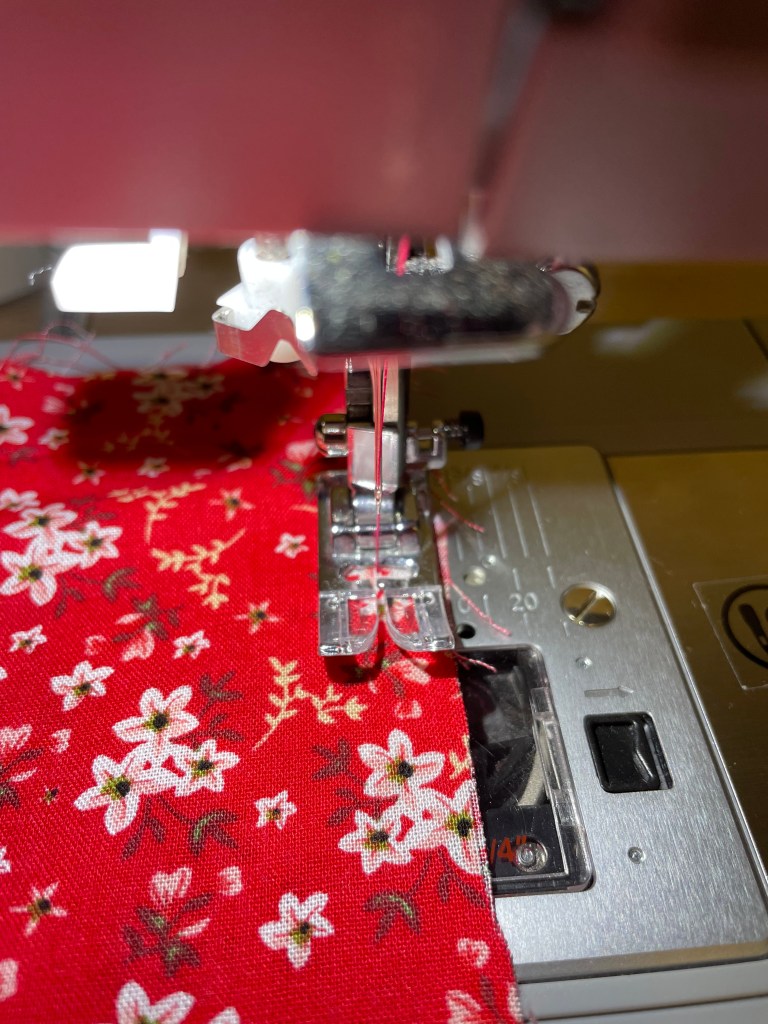
So it’s two months to go, and most of the above list isn’t complete; although I did reach what I think will be the final full toile of my wedding dress last night – still a couple of bits to fix but we are 99% there. Am I stressed? Well yes and no. Obviously two months isn’t a desperately long time. However I am an extremely speedy sewist so I’m not too worried about it all. My main stress until two days ago was the all of the shades of velvet I’d carefully chosen were out of stock for my bridesmaids dresses. Fear not! It’s my own fault for trying to buy it in August. Now that it’s September all the velvet is back in the shops and I’ve ordered what I need so we can get going with those when it arrives. So why am I writing this blog? Well for one thing I have steroid insomnia and I woke up at 4:30 in the morning thinking about my wedding dress sewing experience. The main reason though is that I don’t think we speak enough about sewing your own wedding dress as a project. It seems mystic and far off when the reality is that if you’ve made an evening dress, you’ll probably be able to manage a wedding dress. Nonetheless it can be a taboo subject so I thought it might be useful to share my thoughts and tips for anyone who wants to give it a go.

Top Tips For Sewing Your Wedding Dress

To be clear this is not going to be a highly technical blog about basting, seam finishes, and sewing techniques. Not only are those things radically different depending on the style of dress you choose but also that’s not really what you need to know about sewing your own wedding dress. The fact you may need to look up how to finish a seam is not what will get on your nerves. Wedding dresses are inherently emotional projects. They are also prime real estate for anyone who wants to tell you how you should be sewing your dress. Avoid those people like the plague. The tips I want to share with you are more mindset based. They are to help you through the minefield and hopefully show you by the end that it’s okay to do this exactly how you want to regardless of anyone else’s opinion.

It’s Your Dress.

This sounds glib but at the end of the day the only person wearing this dress is you and even then you’ll only be wearing it for about 12 hours. That means your priorities should be (in this order); comfort, practicality, looking beautiful. Pleasing others is not and should never be on this list. Brides look beautiful when they feel beautiful, not when other people tell them they look it. I once worked a wedding where the bride was 4’11” and as a result she had chosen a stunning 1950s style knee-length fit and flare dress. She looked radiant and it suited her to a tee. Just before she went to walk down the aisle, her mother turned around to her and said ‘oh I wish you hadn’t chosen that dress’ and the bride looked distraught. Her mother went off down the aisle with a groomsmen and I pulled the bride aside for a chat (the role of an event manager can be extremely varied) and I asked her to tell me why she’d chosen this dress. She started telling me how self-conscious she felt about her height, the fact she hates long dresses, how much she loves to dance, how her and her fiancé enjoyed going to lindyhop and swing dance classes, and how unique she felt in her dress. As she told me she became much brighter because she truly loved her dress and felt beautiful regardless of the wisdom her mum had decided to impart. It’s about how you feel in your dress and if someone says to you ‘oh I’m not sure your dress is quite you’ or ‘I would have worn X’ feel free to tell them to wear that to their own wedding or my personal favourite comeback ‘its a good job my wedding isn’t about your outfit’. If you want to feel slinky and svelte? Do it. If you want to live your cinderella dreams? Crack on with my blessing. If you want to go simple and loose? Enjoy! You generally get one chance to sew your own wedding dress, so do it the way you want to, and do it with style.

Only share your progress with people whose opinion you trust.

At the end of the day, sewing your wedding dress is a whole different ballgame to buying one. When you buy a dress you have the stress of finding something you feel perfect in, and to be clear, I’m not minimising that. Saying ‘Yes’ to the perfect dress is not the stress-free single trip that we are led to believe. But. And its a big but. Sewing your wedding dress even if you are using a pattern out of the box will still be more challenging because you have to go through the ugly duck phases where the bust isn’t right or the satin is pulling or the lace isn’t behaving, or the pattern is drafted for someone who is 6ft 4 and you need to adjust it. So as you are going through all of this there are two types of people you may want to show it to; people who sew and can give you genuine advice when you are stuck, or, very close friends or bridesmaids who have no idea how to sew and can just be your personal cheerleader. However when it comes to people who can’t sew here is a word of warning, choose someone who will just be lovely and happy that you are sewing your dress. Do not show your progress stages to anyone who is likely to say any of the following; “I don’t like that bit; why does it look so weird in x place; are you sure you want that design feature; I think it would be nicer if it looked like x; is it supposed to do that?” The progress stages are your proof of concept, your workthroughs, and what you don’t want to do is have your elation at progress dampened by people who think its rubbish because they don’t know these stages are very standard in a sewing project like this. When it comes to people who do sew, just make sure you are clear about the stage you are at and the type of feedback you would like to receive. Tell them it’s a first draft or tell them ‘I just can’t get the fit on my hips correct, can you help?’ but its important to be clear about the feedback you would actually like to receive or else we risk returning to Outcome O. So named(by me) because it turns your pride and elation into ‘oh’ and makes you not want to keep sewing.

Try on every wedding dress you can get your hands on.

A harsh truth of wedding planning whether its venue, flowers, or your wedding dress you will think you want one thing and then you will hate it. The issue is when you are making your dress its a lot of time and investment to put into something you think you will want to wear. When I first went wedding dress “shopping” or ‘our market research trip’ as my mum and sisters referred to it, I tried on every style, every colour, and realised quickly that although your wedding is the chance to wear the dress of your dreams, its also one of the few days that is totally yours. It’s for you and your partner to celebrate a beautiful life event and as a result you want to be comfortable, practical, and feel your best. It will be of no surprise to any of you that my dress is not a confection of tulle and petticoats. But! I had to try on dresses like that just to make sure it wasn’t what I wanted. I tried on the most stunning and enormous dress. It was beautiful, I felt like a princess, and in the photos I look gorgeous. In reality it was a standing still dress. It looked incredible stood on the box in the bridal shop but then you get off the box and walk around and you realise that having the turning circle of a 3.5 tonne van may not be ideal and that’s before we get to the thorny issue of trying to go to the loo. For some people that is their dream and that is brilliant! For me it would have driven me insane in about 5 minutes and I would have felt silly which is not what you want on your wedding day. I only know I don’t want that because I tried it on. So try everything. Try styles you think you’d hate. Try styles you’d never dream of. Try anything and be open to suggestions and then take a million photos. My core conclusions from my shopping trip were as follows:

  • Enormous dresses are beautiful but not for me.
  • Any dress with a corset or corselette is not the best friend of an asthmatic.
  • There is such a thing as too plain.
  • Ask your nearest and dearest to be honest with you and make sure they are on your wavelength. I picked up one dress and my sister remarked ‘it’s fine if you want to look like Glinda the Good Witch’ and she was unerringly correct. The thing is that wouldn’t have occurred to someone else but I would have realised I looked like that 5 minutes before going down the aisle so I’m glad she said it then.
  • First thought best thought. If you look in the mirror and think you look like a cake topper then move on, even if everyone else thinks you look stunning.
  • Make sure you can dance and breathe and move in the style you like.
  • Consider the cost of the fabric and the finish. My favourite dress I tried on was about 80% perfect. I liked the style as a starting point, I liked the way it made me feel, and I really liked that I probably wouldn’t need more than 4m of satin to achieve it. (Side note; the one in the shop didn’t have french seams for £1800 I would expect them on Satin?!)
  • Do not feel guilty for being fussy. You know the saying ‘measure twice, cut once’? Well when it comes to wedding dresses it’s more like a 100:1 ratio.

There are more shades of white than Dulux could dream of and that’s before you get to cream.

This may have been the part I found the most frustrating. Once you enter the world of wedding dresses white isn’t white. You suddenly get white, off-white, pure white, eggshell, ecru, blush (which is a pink type of white), and let’s not forget ivory. It is very very important than you choose the right colour. It’s also mind-numbing. Also bear in mind how colour and tone is created in a wedding dress. Particularly in more voluminous dresses the colour can be built by layer. A white overskirt and white tulle with a blush lining which would give an overall blush finish. The next joy on your plate is translating this to fabric shops who do not work to the same colour standards of the bridal industry, because NOBODY does. I went with a sort of vintage off-white. It looks nice next to my skin, it works well with the style of dress I am making, and most importantly for me, it was clearly identifiable in the fabric shop. All I’m saying with this one is mentally prepare yourself to care more about the colour white than you ever have in your life but also remember, it’s not that deep. What matters is that you feel comfortable wearing and working with your fabric. It’s not your job to sell yourself on the very specific tone of ivory blush that frankly doesn’t exist outside the lighting of that bridal shop. Take it back to basics.

It’s going to take months and you’ll still be working on it until the week before.

This is normal. This is unavoidable. You may buy a wedding dress a year out from your wedding but you’ll be in the shop 3 months before for alterations and 1 month out from your wedding you’ll still be getting any snagging done. This isn’t like any other project you will do. You will start a year out with the designs. You might even buy the fabric at this stage or go trawling through samples to find what you like. You’ll do a toile. You’ll love it. You’ll change it by a fraction and suddenly ruin the whole thing. You’ll move from messy toile fabrics to fabrics similar to your dress and the design suddenly won’t work. You’ll lose weight. You’ll gain weight. You’ll go on holiday. Life will happen. You will have deadlines that mean you have to put your wedding dress on one side for a month. Your opinions will change on how you want your dress to look and that is all natural and part of the process. I’ve had lots of people tell me I’ve left everything too late but no one else knows what too late means in your context. I don’t know if its because I am doing a PhD, which is the academic equivalent of sewing your own wedding dress, but I feel very sanguine about working through drafts and drafts for months whether its my thesis or my wedding dress. It makes it easier to know that you’ll be working on it constantly for 9 months to a year and even if you prepare and plan you will still be hemming it the week before so why stress? Which brings me on to my next tip.

Like any project, figure out how you work best.

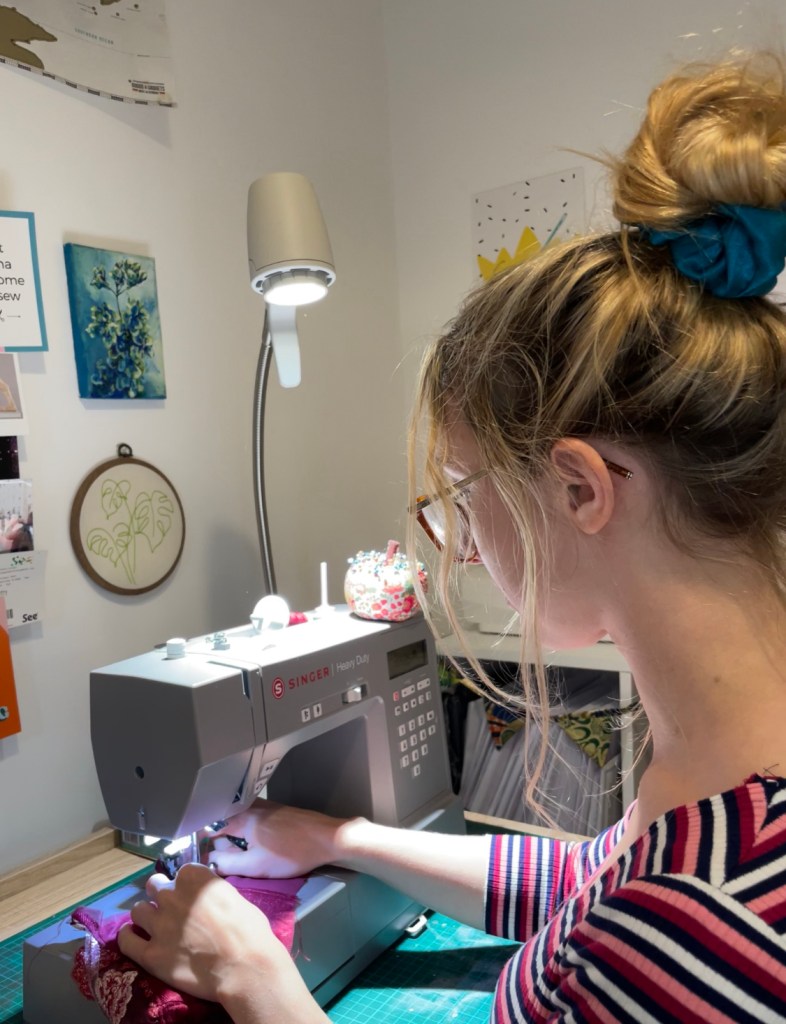
This is starting to sound like an academic skills blog but read on I promise it’s about sewing. To be brutally honest if I had to sew my wedding dress everyday for a month I would go stark-raving mad. I’m not a little and often person when it comes to creating. Just as with my thesis I am a ‘think about it for 6 weeks then suddenly get struck by inspiration’ kind of person. I need thinking time. I need to mull. I need to consider what I like and what I don’t and crucially why I don’t like it. However this means that once I do decide what I want, I choose a day or a night (normally a night when Adam is out at Jujitsu) and just crack on for 4-8 hours. For someone else the way I work would be intolerable or frankly impossible. There are people who would love to chip away at the project every day. There are people who start their dress two weeks out. There are people who hand sew the entire thing (and to be clear those people are insane) but the point is, you have to figure out what you need and how you best work. I fully intend to go to the Southern Sewcial in October to finish off my panic sewing. I know there will be panic sewing so why not actually book in a day to do it!

Start Somewhere. Start Anywhere. Just Start.

Its daunting. I’m not going to sit here and say that it isn’t because it is. And frankly it’s supposed to be. You are preparing for a watershed moment in your life and most likely in your sewing career. It’s scary and do you know what? You’re allowed to stress. Even on your toiles you are allowed to stress about it but it’s so much more important to make some progress than none. People will build up wedding dress sewing as the be all and end all but it just isn’t. You are making a dress. You are putting a pattern together just like you do the rest of the time. If, like me, you had a couple of patterns as starting points then I recommend writing your own instructions as you go, but at the end of the day it’s just another sewing project. Admittedly the fabric is more expensive and the stakes are higher, but don’t let that deter you. Your first toile of your wedding dress is always going to be a proof of concept. You’ll love it. You’ll hate it. You’ll know what needs fixing. You’ll see the germ of your design starting the emerge. No matter what you have to start somewhere and it’s never going to be perfect the first time. My way of tackling the existential dread I had about starting? I put a 30 minute timer on and dashed out a full toile. It was basted together in rubbish acetate that cost me £4, the length of the front and back didn’t remotely match. The bust was too small. The train looked like a tiny puddle that had got caught in my sewing machine. The straps were wrong. The shape of the skirts didn’t match. But none of that mattered because I could see that my dress was in there and it would work out eventually. Think of it like a concept car. The doors may not open. None of the electrics are in it. It’s not truly a car. It’s an indication that your concept works and it gives you a road map.

Finally, remember that in a year’s time you will not care how long the seams took or how frustrating rouleau loops and covered buttons are, or how many toiles you went through, because its frankly the least important part of the day. Getting to walk down the aisle and marry your favourite person on the planet should not hinge on your dress. I would marry Adam in my pyjamas with no make-up on at a registry office at 10:00 in the morning on a random Tuesday with no one else there. It’s lovely to get to wear a beautiful dress and be surrounded by friends and family to celebrate your wedding, but never let the dress get in the way of the wedding.

P.S. If anyone, and I do mean ANYONE, decides to tell you how you could have made your dress better on the day of your wedding, have them removed from the venue.

Making the Most of New Year Sewing Deals: My Top Tips

Hello and happy new year everybody! I will be writing a proper blog to kick off the year but by popular request here are the links to and accompanying commentary on my top Christmas sewing gifts and New Year sale picks!

To find out more catch-up with me over on YouTube and get some ideas for next Christmas as well as a few bargains for yourself in the New Year sales. (There are a couple of affiliate links in this blog that support my content creation but all opinions are my own).

Top 5 Sewing Gifts That Will Delight Any Seamstress

Prym Magnetic Needle Holder – One of my favourite little sewing gadgets and storage mechanisms on the market currently is the Prym Magnetic Needle Holder (I’m sure other brands are available!). Brilliant for storage and safety, this needle holder is made like a lipstick that can be raised or lowered to access your needles .

Fiskar Amplify Shears – The best scissors I’ve ever owned! If I could become sewing santa for one night, I would gift absolutely everybody a pair of these scissors. My Grandma bought them for me for Christmas in 2020 and I’ve literally never had to sharpen them, I’ve never found any fabric they can’t cut, and I’ve used them every single day since I first unwrapped them.

Prym Magnetic Wrist Pin Holder – Possibly the most high traffic item in my sewing room except my sewing machine is my magnetic wrist pin cushion. I love that it is easy to use on my sewing machine or while I’m crawling around the floor cutting fabric or hemming skirts.

Guterman Thread Bible – there isn’t a sewist in the world who doesn’t want or need more thread so the Gutermann thread bible is always a well-received gift. Mine was originally given to me by Singer Outlet and it’s been a god send. Although there is only one thread of each colour, there are a total of 42 different colours represented plus a chart so you can remember which colour is which and buy more. I’ve found it to be a fantastic addition to the sewing room, particularly for colour matching new fabrics or in a pinch if I’ve forgotten to buy thread for a project!

For my fifth gift category I’ve added some of my favourite sewing books which I either own or have bought for others and would 100% recommend for beginners and experienced sewers alike!

Big Ticket Items

Singer Heavy Duty HD 6705C – You guys know that I love my Singer Heavy Duty machine, so much so that I filmed a review vlog all about it! This time of year is ideal to grab yourself a new sewing machine or overlocker for half the normal price. This is the season where sewing machine manufacturers bring out the new models of their machines which means the old ones are normally reduced to clear. Personally I love my Singer HD6705C but there are plenty of brilliant machines out there! Check out Singer Outlet for some brilliant deals and John Lewis is great this time of year as well for some heft machine discounts.

Oliso Smart Iron – This iron has made such a difference to my sewing journey. The ceramic plate is so gentle on my fabrics, the steam distribution is phenomenal, and I LOVE the adorable little feet that mean you can leave it face down without the iron coming into contact with the ironing board or your fabric. Plus after testing a number of different irons I can confirm that this one has the best water filling mechanism. The only wish I have is that they would come out with a cordless version!

High Definition Serious Light (affiliate link / ad) – I have used my High Definition Table Light pretty much daily for the past two years. It is my core companion for unpicking, hand-sewing, working with dark fabrics, threading needles, and colour matching my threads and notions. So I have absolutely no hesitation in recommending it! The High Definition light has a flexible neck, adjustable beam width, adjustable light intensity, plus the heavy base means that it is nice and stable even when my sewing machine is vibrating the desk! The Serious Light Daylight Wavelength Technology doesn’t only light up your fabric but replicates the daylight spectrum as closely as possible to show true colour. Head to the website and use code ‘SR470’ to get yourself £100 off the High Definition Light + FREE Delivery!

Product Review: Are Serious Lights Any Good For Sewing?

Hello folks! It’s been quite some time since I’ve done a blog like this but after using my Serious Light for nearly two years, it felt like it was about time for a product review. Just to note that I have been asked to write a blog post but as always all views are my own. 

Personally I use the High Definition Table Light and I also use the Compact Light. The High Definition lives on my desk to help with all sewing and writing, and the Compact moves around the house with me for fabric cutting, ironing, and hand-sewing if I fancy doing that in the living room or somewhere else. In this review however I’m going to be focusing on the High Definition Light that is the main one I use. 

What Do You Need To Sew?

Sewing is one of those hobbies that lends itself to the gimmick, to the extra toys and equipment that looks super cute in your sewing room but doesn’t actually help you sew. When you first start sewing  it can be absolutely impossible to know what you need. For myself I would argue that there are some non-negotiable basics; a sewing machine for one, but also scissors, thread, and a quick-unpick.

However what we don’t often consider is where we sew. Some sewists will have a stunning sewing and craft room decked out with every sewing gadget under the sun, their fabric carefully catalogued and their patterns arranged, every single bit of the space designed to support them to sew. Other sewists (read; most of us) have to make do with a corner of a room, or a temporary spot on the dining room table that means we have to set-up and dismantle every time we sew. This means we rarely get a chance to consider what we need from a sewing space when we get to sew. 

Think about your best sewing experience, chances are it was at a workshop or a studio or just a day when you have the house to yourself and you get to spread out and get comfy. Now think about that experience and consider, what did you have? The common themes of a good sewing space are comfort, you don’t want your bum to go numb while you are stitching equally you don’t want a crick in your neck from staring at your seam allowance gauge; space, room to manoeuvre, to cut fabric, to put your pins and scissors down, to wrangle with an iron; and light, you’ve got to be able to see what you are doing. There is nothing worse than sitting down at nine at night to do some sewing and having to stop after five minutes because you’ve got a headache. 

Using My Serious Light For Sewing

For me this is where my Serious Light comes in. We rent our flat so we have no control over the amount of lighting in our rooms or its location which, for crafting, is no good at all. Particularly in the autumn and winter when the days are getting shorter and shorter.  

So a few words on the basics of the light. I use the High Definition Table Light and have done for the past two years. 

I would say the High Definition Light is very intuitive. It has a flexible neck, adjustable beam width, adjustable light intensity, and I find it’s very easy to adapt the light to the task I’m doing that day and the existing light conditions. The heavy base means that it is nice and stable even when my sewing machine is vibrating the desk! 

The light itself creates a beam or pool of directed light as opposed to a soft ambient light which makes it ideal for sewing and crafting. The lights use Daylight Wavelength Technology to ensure that the colour spectrum represented is as close as possible to natural daylight. This means for sewing that colours are represented accurately and you don’t have to worry about mismatches in the light of day. 

One thing I will say, and you know I never shy away from this, is that they do represent an investment. The High Definition Light is £349.99 which I know can seem like a lot, particularly in the current climate, however it will last for a very long time. The lights are fully manufactured in Britain(just up the road from me!), they are low heat, low energy, and have a 5 year warranty, plus they have payment spreading options through Klarna (read on for a very helpful discount code!). It is an investment but it’s an investment in your sewing and provides more opportunities for you to sew whenever works for you not just when the stars align and you have time, space, and enough daylight to sew by! 

What Do I Actually Use My Serious Light For?

I first started collaborating with Serious Lights back in 2021 when they sent me the High Definition Light and, as always, I have a trial period before I start promoting anything. Honestly? I’ve used it every single day since. I’ve used it to sew some of my most complex makes like my graduation outfit where accuracy and attention to detail was crucial, I’ve used it to help me hand sew and thread needles, I’ve used to sew at 10pm or 6am so I can get some sewing in before work, I even wrote half of my MA thesis using it as I work at unconventional hours. So I have absolutely no hesitation recommending this light to you. 

As this is a review blog, here are the main areas I would say it helps me with:

  • Unpicking – Particularly on woolly/fluffy fabrics, darker fabrics, or projects where the thread and the fabric can be indistinguishable e.g. working with lace. I used to have to wait to unpick until the daytime so I could actually see what I’m doing but now I just use my serious light and focus the beam on where I am working. 
  • Hand-sewing – I used to get all tied in knots with hand sewing but I find having a focused light helps me not only keep track of my thread but also I find it much easier to monitor the quality of my stitches without getting a headache. 
  • Working with dark fabrics – This is a big one for me because I work with a lot of dark and thick fabrics at this time of year so I need my light to make sure my fabric is the right way around, I’m sewing the right section, or snipping the right seam!
  • Threading Needles – This is a classic, it’s just ludicrously easier to thread a needle with my Serious Light on, I can actually see what I’m doing and it makes the whole process stress-free. 
  • Colour Matching – No one wants to wake up, look at their sewing from the night before and find that your matching thread is actually a contrast! With their proprietary Daylight Wavelength Technology the Serious Light doesn’t only light up your fabric but it shows the true colour. This is brilliant for colour matching threads, linings, and notions. It also gives you a true picture of what you are working on and means that you can sew anytime of day and the result will be the same. 

Serious Lights are fantastic for sewing, particularly the high definition light. The weight and stability makes it a sturdy sewing companion while the variable light levels and intensity mean that you can adjust your light for whatever weather or time of day you are sewing. 

If you would like to treat yourself to one then you are in luck! Serious Lights have very kindly given me a discount code for you folks. Use code ‘SR470’ to get yourself £100 off the High Definition Light + FREE Delivery! So if you want to treat yourself for Christmas don’t forget to use the discount code and get yourself a little discount on the website

Progress Not Perfection: My Sewing Philosophy

As I sit writing this I have ginger biscuits in the oven, a recipe Ive spent years perfecting, I’m wearing my first pair of Hudson Trackies with a hole that needs repairing, because in the time since I made them I’ve learnt about the existence of triple stitch and its usefulness in trousers, and my first Tammy Handmade Naya Tshirt with slightly dodgy neckline binding, which if I made again now I would ensure I stretched consistently the whole way around. What is the common theme? In order to become proficient in a skill you have to practice it. The first thing you make, write, create, is rarely perfect.

I can make cornish fairings with my eyes shut because I grew up making them with my grandma. Decades of practice have led to a skill I don’t even think about anymore. However along the way there have been burnt batches, oddly shaped biscuits, in correct mixtures, as I’ve honed the skill. Not only is that okay but it is expected. So why don’t we feel the same way about sewing?

Recently I’ve seen a lot of people talking about how much clothing is being ‘churned’ out by instagram sewists. How people are creating badly made garments simply to keep up with the demand of social media sewing. While I’m sure there are some people who attempt to keep pace with algorithm, I think the reality is more simple.

Sewing is a hobby. It is a skill. If it takes 10,000 hours to truly master a skill, then chances are you’re going to be doing a lot of sewing and learning a specific skill once then moving on isn’t going to cut it. You have to do hundreds of zip, thousands of button holes, miles upon miles of under stitching and even then you are probably only an eighth of the way towards mastery. Every crafting hobby involves making something whether its pottery, quilts, loaves of bread, or dresses, and every time you make something you get better.

The fact is that sewing isn’t just a means of creating clothing, it is a hobby and a skill. That means you are going to churn out some god-awful garments in the process. You will insert sleeves backwards or inside out. You will accidentally cut a hole in your almost finished garment when grading a seam. You will accidentally catch part of your garment in a separate seam and want to throw the whole franken-mess of a project out of the window. And at the end of it all you may not even like what you made, but that is okay. You will have learnt something. It might be something as simple as don’t grade seams on a black garment in the dark (yes I have done this exact thing) or that pressing darts up rather than down provides a better shape for a larger bust. You might learn something more substantial such as how to shrink the raw edge of a circle skirt to sew a curved hem or how to sew a welt-pocket.

By placing perfection above all else, not only can you lose the raw creative energy that is so much part of sewing but also you put a lot of pressure on yourself not to put a foot wrong. I experienced this recently while making my Jasika Blazer. I started it back in December and I was merry stitching away until I reached the section on welt pockets and I was stumped. I watched tutorials. I had a go on scrap fabric. But none of it would translate in my head to the blazer in front of me. So I left it on the mannequin until two days ago when I decided that enough was enough and I just did it. Now those pockets are awful. They are truly horrendous. BUT they exist, they function, and they may not be perfect but it’s progress. Now I’m out of the mire of indecision and terror of ruining my blazer, I feel much more relaxed.

Don’t get me wrong here, I’ve made loads of mistakes in the last two days and this blazer will almost definitely end up as a wearable toile rather than the finished article but that is okay because I’m enjoying the process again. I’ve had so much fun just having a go knowing that every mistake I make is a lesson I’m learning. I like to know why I have to do something a certain way and the best teacher for me is doing it wrong and finding out exactly what that is wrong.

There are so many things you should do and shouldn’t do. You should make a toile, you should finish your raw edges, you shouldn’t use your fabric without pre-washing, you shouldn’t sew over your pins, but really what it comes down to is ‘what do you want out of sewing?’ Personally I want to learn, I want to relax, and above all I want to have fun, and the fantastic wardrobe I’m building is merely a by-product.

So today I want to encourage you to go through your ‘Work In Progress’ basket and think about progress not perfection. What tiny thing, or even big thing, can you do to make progress on a project you are stuck on? Can you iron on some interfacing? Can you do a quick rolled hem? Can you overlock the raw edges so its ready for the next big step? Remember it doesn’t have to be perfect. It doesn’t even have to correct! You can always unpick it later. It just needs to be a step forward.

Now if anyone wants me for the next month I’ll be finishing works in progress before starting my new adventure in September!

Step By Step Guide To Sewing French Seams

At the moment I am up to my eyes in patterns tests, I have about four to complete in the next three weeks. The upshot of this is that I can’t really share what I’m sewing… HOWEVER! One of these patterns tests is a french seamed garment and it got me thinking that I really should write up and film a french seam tutorial.

Along with threading an overlocker, French seams have a bad reputation for being awkward, difficult, and generally causing issues. French seams confuse a lot of sewists out there and I get it because quite frankly they are counter intuitive and if you get them wrong you can’t really do them again.

Despite that they are actually my favourite seam finishing technique and you can use them on any project with lightweight fabrics. The only stipulation it that you need to be able to iron the fabric or at least press it down with a clapper.

To help other sewists love french seams as much I do I’ve put together a handy guide to take you through the process step by step!

Step By Step Guide To French Seams

Step 1: Workout your Seam Allowance split

Step 2: Sewing First Seam WST

Check your seam allowance and work out how you are going to split it if not indicated in the pattern. For this pattern I am using a 2cm seam so we are sewing both seams at 1cm. However if you are working with a standard 1.5cm seam then I normally split it as 1cm then 0.5cm(in line with the inside line of the presser foot.

Step 2: Sew your first seam

Sew your first seam with the fabric Wrong Sides Together. It feels very strange but you should end up with your seam on the outside of your garment.

For my garment this seam will have a 1cm allowance but remember to check what you should be working to on your project.

Step 3: Trim off the excess

Trim the volume of the seam down as close as you dare to the stitching line. Be very careful when doing this that you don’t actually snip the stitches or catch any of other sections of the garment in your scissors.

Step 4: Flip the seam so that the fabric is now Right Sides Together

When you do this make sure the press the new seam so you get a lovely crisp edge and secure what will now be the inner line of stitching enclosed in the second seam.

Step 5: Sew your second seam enclosing the first one

Sew your second seam as you would usually with the garment Right Sides Together. Again remember to check what seam allowance you should be using for my project its another 1cm seam allowance however yours might be 0.5cm at this stage. Remember that this seam should completely enclose the first seam. If you have fabric from the first seam poking out through the second seam then you need to trim the first seam down even further.

After sewing give your seam a good press. When you turn your garment through to the right side it should look like a perfectly normal seam with nothing poking through.

Secrets of French Seaming

  • You can split the seam allowance however you like! You don’t have to do it in the exact measurements supplied by the pattern as long as the seam allowance amount is correct at the end. I tend to use the 2/3 1/3 method. E.g. When I’m doing a 1.5cm french seam regardless of what the pattern says my first seam is 1cm. Then I trim and flip and my next seam is 0.5cm.
  • Iron at every stage! It helps set the stitches and secures every stage making an overall stronger seam.
  • French seaming sleeves is not nearly as complex as you think it’s going to be. It’s award but I promise it isn’t difficult and the result is brilliant!
  • When working with chiffon or similar very lightweight fraying fabrics I strongly recommend finishing the edges within the seam so there is less chance of them fraying and ripping open. E.g. I stitch together Wrong Sides Together, trim, then I finish what is left with a zigzag stitch, then I flip through and sew the final seam with fabric Right Sides Together.
  • Move all the other fabric out of the way before trimming your first seam – this is the number one way to cut a huge hole in your beautiful new make completely by accident. The worst thing is? You won’t even realised you’ve done it until the end when you turn your new make right side out.

That is my tutorial for beautiful French seams! My biggest piece of advice? Don’t overthink it. Take it slow and follow the steps and you will get there.

French seams are my absolute favourite finishing technique and as I’m doing a lot of them today it felt like a nice to time to write about them. I don’t write up tutorials very often so if you enjoyed this blog and want to see more then please do let me know in the comments and share it with your sewing friends.

Make Do And Mend: Looking After Your Me-Made Wardrobe

When I made the choice to reduce my consumption of fast fashion, I also signed up to another pledge. I committed to looking after my existing ready-to-wear wardrobe.

My focus has shifted from trends to joy. Joy of fashion. Joy of garments. Joy of sewing.

I want to achieve something with my me-made wardrobe that many fast-fashion brands do not, and make my garments last.

Fast fashion brands like Shein, Pretty Little Thing, and Boohoo churn out poorly made clothes designed to be worn, wear out quickly, and throw away after six months so that you can buy into the next big trend.

Each piece of clothing is a stepping stone to the next piece and very little consideration is given to the longevity of our wardrobes.

With me made garments we invest time and energy. We put care into every step and create something that we want to wear and we look after it.

However sewing doesn’t mean throwing out your existing ready-to-wear wardrobe, I have RTW clothes that have lasted over 10 years with careful washing and conscious approach to their care.

Caring For Your Wardrobe

A quick test to see if you look after your wardrobe. Do you know what these symbols mean? Chances are you’ve seen them as you hang your clothes out or briefly as they disappear into the washing machine. I know that I didn’t understand them for years. Sometimes I still get confused!

These symbols describe how you should care for your clothes and yet most of us don’t understand them or just don’t read them. However they are the key to caring for our RTW wardrobes. To tell us what to do and crucially what not to do! What temperature to wash at. Whether or not it can be tumble dried. Even sometimes what temperature your iron should be.

Following these symbols prolongs the life of garments and therefore helps us to consume less. This article is not here to berate you, I’m not trying to tell you off because honestly who has time or energy for complex garment care.

When we do get to the point where mending is required, when a button falls off, a zip breaks, seams fray and split, we are more likely to throw the garment away or take it to charity than we are to fix it. The reality is that that is how we’ve been conditioned to engage with clothing and the fashion industry. But we don’t have to. We can choose to look after our clothes properly, we can even refashion our clothes to make new garments we will love for longer.

The Joy Of Mending

Put your hand up if you honestly like mending things. Whether thats for yourself or for others. No? No takers? Exactly, mending is a sewing chore.

It’s not fun, it’s time consuming, irritating and frankly most of us would rather be doing anything except sewing a button back on. Which makes it even more annoying that mending is a crucial skill and one that will make your clothes last almost forever.

Regardless of how boring mending can be it truly is a superpower held by sewists and dressmakers and one we must use. We can do mending easily ourselves if we put our minds to it. We have the knowledge to insert a new zip or fix a fraying hem. If you’re lucky you’ve got a sewing machine like mine that will attach buttons for you with no hand sewing involved!

My Top 5 Garment Mending Tips

  1. Don’t leave it. If you notice a seam starting to fray, a button becoming loose, fix it then and there.
  2. For patching tiny holes in garments or reinforcing newly sewn-up rips try adding a bit of iron-on interfacing
  3. Don’t be scared to refashion. If you’ve got a garment that has a huge rip or hole, why not considering making it into something else so it can return to your wardrobe.
  4. Consider visible mending with embroidery. It’s a fun way to customise a garment and add a bit of personality.
  5. Set aside one day a month to tackle the mending and refashion bag. Grab a cup of tea, stick something on the radio or the TV, and get sewing!

10 Ultimate Truths of Sewing

Whether it’s the white knuckle ride of bobbin chicken when you know you have none of the matching thread left in the house, the infuriating second side of your zip, or the soul crushing realisation that you’ve just cut a huge whole in the middle of your garment when trimming a french seam, we’ve all been there.

One of the wonderful things about the sewing community is that we all have these experiences. Whether you’ve been sewing for 5 days or 25 years you will have to unpick something, you will attached a sleeve the wrong way around, and you break a sewing needle so badly it’s left looking like a paperclip (just me?). These things happen.

As an experienced sewist I’ve learnt that there are certain fundamental rules of sewing and it is wise to prepare. For example, never buy only one spool of a very specific thread colour, get a couple; check your bobbin level BEFORE starting a very long seam; and never ever put your seam ripper away. In the same way that when you call someone from IT when your computer breaks only to find it works when they are stood there. While your seam ripper lies next to you everything is fine. The minute you put your seam ripper away, you send a cosmic signal to the universe asking to unpick half of your garment and put a sleeve in wrong side out. It’s pure hubris and I have to stop doing it.

To get back into blogging I thought I would pull together my list of ultimate sewing truths, the rules at the heart of the thread-iverse. I should say, there will be someone who takes this too seriously so for the sake of a small minority(who always make their toiles), this post is based on my experiences of sewing and is also just a bit of fun.

10 Ultimate Rules of Sewing

  1. Even the most accomplished dressmaker has to unpick things
  2. The one time you don’t follow the fabric allowance on the pattern is the time you will actually need it.
  3. One side of your zip will be perfect first time, the other side will take 17 tries
  4. It is easier to get a degree in Nuclear Physics than it is to work out the correct overlocker tension first time
  5. No one actually changes their sewing machine needle every 8 hours
  6. If your thread is going to run out, it will do it in the middle of topstitching
  7. No matter what is in your wardrobe, you will find yourself sewing a new dress hours before you have to leave
  8. Toiles are both incredibly important and stunningly dull, as all the most useful things are.
  9. Whenever you think you’ve sewn something perfectly first time, you will find your bobbin ran out at the beginning and you have to do it all over again
  10. Always get two more buttons than you need. An extra for when you inevitably miscount the number you needed in the first place and one to go in the buttonhole foot after you’ve attached the rest without thinking.

This very silly and fun post signals that I am indeed back to blogging regularly. I will write a proper life update so you lot can know what I’m up to, where I’ve been, and where I’m going. But! In the meantime, let me know what you would add to this list in the comments below! I’m considering having it put on a tea towel.

New Year, More Sewing: My Sewing Resolutions For 2023

Well here we are again, a new year begins! I’m not going to say that ‘I’m back’ as in my experience any post that starts like that is cursed not to be followed up for 6 months but I will acknowledge that I have taken a break from blogging. The break roughly coincided with me writing my MA dissertation followed by my busiest work period of the year so entirely understandable but still I have really missed blogging.

As I write this I am sat on the sofa watching the original Mission Impossible (great film) and attempting to relax. In the days leading up to New Year I’ve been cleaning, tidying and rearranging my sewing space but today I just needed a moment to rest. Tidying the sewing space and moving the furniture around has been a great way to give the space a new lease of life as well as thoroughly evaluate what is still relevant to my sewing and what needs to exit stage right, as it were.

Last year was an interesting one for my sewing it has to be said. Recently I joined in a fun instagram trend and put together a reel of everything I have made this year. It showed me just how much I’ve grown and developed my sewing skills. 2022 saw my first trips abroad since I got back into sewing properly and allowed me to do some very fun holiday sewing. My first crack at swimwear was a massive success and I really enjoyed putting together me made holiday wardrobes for each trip.

The second edition of Sew Yellow for Endo raised £1075 for Endometriosis UK, 4 brave sewists spoke about their experiences with Endometriosis and over 150 sewists took part. Together we turned instagram yellow for the day and for that we should all be so proud. Thank you all for your time and effort and I can’t wait for Sew Yellow For Endo 2023! If anyone wants to sponsor please do get in touch as planning is starting this week.

2022 also saw collaborations with pattern brands such as Cashmerette and Tammy Handmade, Lush Cloth gave me the chance to be one of their guest bloggers, Orya Textiles gifted me some incredible fabric and helped me achieve one of my make nine, and I got to collaborate with fellow bloggers and vloggers in the sewing community, trying new patterns such as the Sicily slip dress with Tamlyn from Sewn on the Tyne and the Allie Olsen Highland Wrap Dress with Sew Do It Emma. I learnt so much from these collaborations and I would like to thank everyone I worked with in 2022 for their patience with me and my unpredictable work schedule!

So what’s next for So What If I Sew? 2023 is my year to shift my focus from work to my personal life, my relationships, my hobbies, and my habits. I hope to have lots more opportunities to collaborate with my fellow sewists and I’ve set myself another Make Nine challenge which you can hear all about over on YouTube, but I’ve also set myself two goals for my own sewing.


Sewing For All Seasons Not Just Summer

My handmade wardrobe is definitely more skewed towards the summer. I think mainly because summer fabrics are much easier to sew with. Cottons and viscoses are easier to work with and in my experience summer patterns come together much more quickly.

However this has left a gap in my wardrobe. I have very little outerwear, I have very few cosy makes, and almost nothing I’ve made in any stretch/jersey fabrics which tends to be what I wear from October to February. In the winter I’m all about jeans, heeled boots, cosy jumpers, and long sleeved tops, and the fact is that I am now able to sew quite a few of those items.

So this year I want to challenge myself. I’ve put the Atelier Jupe Alex Coat on my Make Nine, I’m also going to dive into a new t-shirt/3/4 length sleeve top pattern later today, and I have some incredible purple denim that I’m working up the courage to sew with.

In 2023 we will be going on a cold holiday for the first time in a while and we will be headed to Prague so the cogs are already turning trying to figure out which bits of my me made wardrobe will be suitable and what I can get made before we go! I don’t know about you but holidays can be great motivators to crack through some projects and get them into the wardrobe rotation.

So the goal for this year is to turn my attention to seasonal sewing and consider what I wear when and whether I can I can plug any seasonal wardrobe gaps with me mades.

I Need To Spend Some Time Understanding My Own Style

One of my first goals for my sewing was to create workwear I loved and felt confident in and after the last year I can put my hand on my heart and say I have achieved that goal. Now its time to zoom out a bit and think about what I like wearing. This year is all about work/life balance for me and as part of that I want to separate my work wardrobe from my personal wardrobe and make sure I have clothes that reflect my personality.

Back in October my friend Louisa and I did a massive clear out of my wardrobe and got rid of all the things that I no longer wear because they aren’t really my style. Now going forward I’m trying to figure out what my style is. I know what colours I like wearing which is a good start and I know that my style definitely changes between the seasons, I’m not a Pinterest girl with one year round aesthetic and colour palette.

In 2023 I’m going to experiment more and think about what clothes make me feel most “me” whatever that means and build a wardrobe for my personal and social life that make me feel as confident as my workwear wardrobe does. The measurable, because for me there has to be a measurable, is to finish the year with a mood board for each season of clothes that I love wearing and make me feel like me.


Above all I want to make sure that this year I take the time to enjoy the learning process as well as making garments that I want to wear. Currently I am working on the Closet Core Jasika Blazer and whilst it is difficult it is also an incredible learning curve and I feel so proud when I complete every step. I want a mix of quick win projects to help sustain my motivation and challenging projects that make me work my brain and on the completion of which I feel exceptionally proud.

So here’s to 2023 a year of creativity, connection, and continued sewing!