At the moment I am up to my eyes in patterns tests, I have about four to complete in the next three weeks. The upshot of this is that I can’t really share what I’m sewing… HOWEVER! One of these patterns tests is a french seamed garment and it got me thinking that I really should write up and film a french seam tutorial.
Along with threading an overlocker, French seams have a bad reputation for being awkward, difficult, and generally causing issues. French seams confuse a lot of sewists out there and I get it because quite frankly they are counter intuitive and if you get them wrong you can’t really do them again.
Despite that they are actually my favourite seam finishing technique and you can use them on any project with lightweight fabrics. The only stipulation it that you need to be able to iron the fabric or at least press it down with a clapper.
To help other sewists love french seams as much I do I’ve put together a handy guide to take you through the process step by step!
Step By Step Guide To French Seams
Step 1: Workout your Seam Allowance split
Check your seam allowance and work out how you are going to split it if not indicated in the pattern. For this pattern I am using a 2cm seam so we are sewing both seams at 1cm. However if you are working with a standard 1.5cm seam then I normally split it as 1cm then 0.5cm(in line with the inside line of the presser foot.
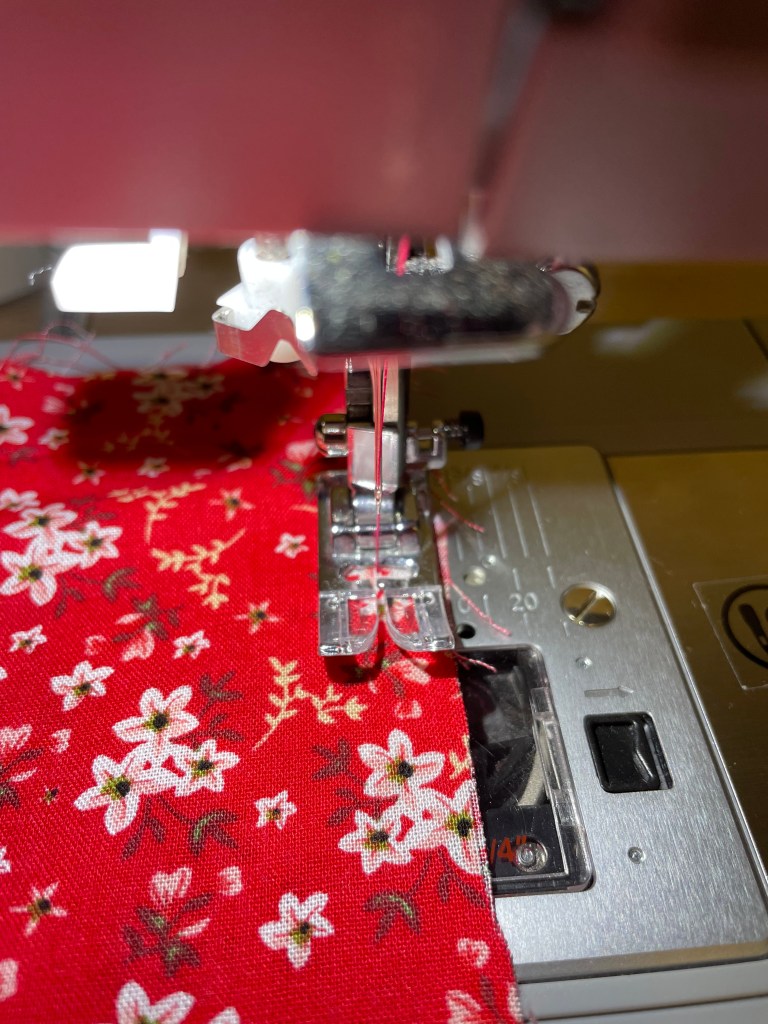
Step 2: Sew your first seam
Sew your first seam with the fabric Wrong Sides Together. It feels very strange but you should end up with your seam on the outside of your garment.
For my garment this seam will have a 1cm allowance but remember to check what you should be working to on your project.
Step 3: Trim off the excess
Trim the volume of the seam down as close as you dare to the stitching line. Be very careful when doing this that you don’t actually snip the stitches or catch any of other sections of the garment in your scissors.

Step 4: Flip the seam so that the fabric is now Right Sides Together

When you do this make sure the press the new seam so you get a lovely crisp edge and secure what will now be the inner line of stitching enclosed in the second seam.
Step 5: Sew your second seam enclosing the first one
Sew your second seam as you would usually with the garment Right Sides Together. Again remember to check what seam allowance you should be using for my project its another 1cm seam allowance however yours might be 0.5cm at this stage. Remember that this seam should completely enclose the first seam. If you have fabric from the first seam poking out through the second seam then you need to trim the first seam down even further.
After sewing give your seam a good press. When you turn your garment through to the right side it should look like a perfectly normal seam with nothing poking through.
Secrets of French Seaming
- You can split the seam allowance however you like! You don’t have to do it in the exact measurements supplied by the pattern as long as the seam allowance amount is correct at the end. I tend to use the 2/3 1/3 method. E.g. When I’m doing a 1.5cm french seam regardless of what the pattern says my first seam is 1cm. Then I trim and flip and my next seam is 0.5cm.
- Iron at every stage! It helps set the stitches and secures every stage making an overall stronger seam.
- French seaming sleeves is not nearly as complex as you think it’s going to be. It’s award but I promise it isn’t difficult and the result is brilliant!
- When working with chiffon or similar very lightweight fraying fabrics I strongly recommend finishing the edges within the seam so there is less chance of them fraying and ripping open. E.g. I stitch together Wrong Sides Together, trim, then I finish what is left with a zigzag stitch, then I flip through and sew the final seam with fabric Right Sides Together.
- Move all the other fabric out of the way before trimming your first seam – this is the number one way to cut a huge hole in your beautiful new make completely by accident. The worst thing is? You won’t even realised you’ve done it until the end when you turn your new make right side out.
That is my tutorial for beautiful French seams! My biggest piece of advice? Don’t overthink it. Take it slow and follow the steps and you will get there.
French seams are my absolute favourite finishing technique and as I’m doing a lot of them today it felt like a nice to time to write about them. I don’t write up tutorials very often so if you enjoyed this blog and want to see more then please do let me know in the comments and share it with your sewing friends.
