Making the Most of New Year Sewing Deals: My Top Tips

Hello and happy new year everybody! I will be writing a proper blog to kick off the year but by popular request here are the links to and accompanying commentary on my top Christmas sewing gifts and New Year sale picks!

To find out more catch-up with me over on YouTube and get some ideas for next Christmas as well as a few bargains for yourself in the New Year sales. (There are a couple of affiliate links in this blog that support my content creation but all opinions are my own).

Top 5 Sewing Gifts That Will Delight Any Seamstress

Prym Magnetic Needle Holder – One of my favourite little sewing gadgets and storage mechanisms on the market currently is the Prym Magnetic Needle Holder (I’m sure other brands are available!). Brilliant for storage and safety, this needle holder is made like a lipstick that can be raised or lowered to access your needles .

Fiskar Amplify Shears – The best scissors I’ve ever owned! If I could become sewing santa for one night, I would gift absolutely everybody a pair of these scissors. My Grandma bought them for me for Christmas in 2020 and I’ve literally never had to sharpen them, I’ve never found any fabric they can’t cut, and I’ve used them every single day since I first unwrapped them.

Prym Magnetic Wrist Pin Holder – Possibly the most high traffic item in my sewing room except my sewing machine is my magnetic wrist pin cushion. I love that it is easy to use on my sewing machine or while I’m crawling around the floor cutting fabric or hemming skirts.

Guterman Thread Bible – there isn’t a sewist in the world who doesn’t want or need more thread so the Gutermann thread bible is always a well-received gift. Mine was originally given to me by Singer Outlet and it’s been a god send. Although there is only one thread of each colour, there are a total of 42 different colours represented plus a chart so you can remember which colour is which and buy more. I’ve found it to be a fantastic addition to the sewing room, particularly for colour matching new fabrics or in a pinch if I’ve forgotten to buy thread for a project!

For my fifth gift category I’ve added some of my favourite sewing books which I either own or have bought for others and would 100% recommend for beginners and experienced sewers alike!

Big Ticket Items

Singer Heavy Duty HD 6705C – You guys know that I love my Singer Heavy Duty machine, so much so that I filmed a review vlog all about it! This time of year is ideal to grab yourself a new sewing machine or overlocker for half the normal price. This is the season where sewing machine manufacturers bring out the new models of their machines which means the old ones are normally reduced to clear. Personally I love my Singer HD6705C but there are plenty of brilliant machines out there! Check out Singer Outlet for some brilliant deals and John Lewis is great this time of year as well for some heft machine discounts.

Oliso Smart Iron – This iron has made such a difference to my sewing journey. The ceramic plate is so gentle on my fabrics, the steam distribution is phenomenal, and I LOVE the adorable little feet that mean you can leave it face down without the iron coming into contact with the ironing board or your fabric. Plus after testing a number of different irons I can confirm that this one has the best water filling mechanism. The only wish I have is that they would come out with a cordless version!

High Definition Serious Light (affiliate link / ad) – I have used my High Definition Table Light pretty much daily for the past two years. It is my core companion for unpicking, hand-sewing, working with dark fabrics, threading needles, and colour matching my threads and notions. So I have absolutely no hesitation in recommending it! The High Definition light has a flexible neck, adjustable beam width, adjustable light intensity, plus the heavy base means that it is nice and stable even when my sewing machine is vibrating the desk! The Serious Light Daylight Wavelength Technology doesn’t only light up your fabric but replicates the daylight spectrum as closely as possible to show true colour. Head to the website and use code ‘SR470’ to get yourself £100 off the High Definition Light + FREE Delivery!

Product Review: Are Serious Lights Any Good For Sewing?

Hello folks! It’s been quite some time since I’ve done a blog like this but after using my Serious Light for nearly two years, it felt like it was about time for a product review. Just to note that I have been asked to write a blog post but as always all views are my own. 

Personally I use the High Definition Table Light and I also use the Compact Light. The High Definition lives on my desk to help with all sewing and writing, and the Compact moves around the house with me for fabric cutting, ironing, and hand-sewing if I fancy doing that in the living room or somewhere else. In this review however I’m going to be focusing on the High Definition Light that is the main one I use. 

What Do You Need To Sew?

Sewing is one of those hobbies that lends itself to the gimmick, to the extra toys and equipment that looks super cute in your sewing room but doesn’t actually help you sew. When you first start sewing  it can be absolutely impossible to know what you need. For myself I would argue that there are some non-negotiable basics; a sewing machine for one, but also scissors, thread, and a quick-unpick.

However what we don’t often consider is where we sew. Some sewists will have a stunning sewing and craft room decked out with every sewing gadget under the sun, their fabric carefully catalogued and their patterns arranged, every single bit of the space designed to support them to sew. Other sewists (read; most of us) have to make do with a corner of a room, or a temporary spot on the dining room table that means we have to set-up and dismantle every time we sew. This means we rarely get a chance to consider what we need from a sewing space when we get to sew. 

Think about your best sewing experience, chances are it was at a workshop or a studio or just a day when you have the house to yourself and you get to spread out and get comfy. Now think about that experience and consider, what did you have? The common themes of a good sewing space are comfort, you don’t want your bum to go numb while you are stitching equally you don’t want a crick in your neck from staring at your seam allowance gauge; space, room to manoeuvre, to cut fabric, to put your pins and scissors down, to wrangle with an iron; and light, you’ve got to be able to see what you are doing. There is nothing worse than sitting down at nine at night to do some sewing and having to stop after five minutes because you’ve got a headache. 

Using My Serious Light For Sewing

For me this is where my Serious Light comes in. We rent our flat so we have no control over the amount of lighting in our rooms or its location which, for crafting, is no good at all. Particularly in the autumn and winter when the days are getting shorter and shorter.  

So a few words on the basics of the light. I use the High Definition Table Light and have done for the past two years. 

I would say the High Definition Light is very intuitive. It has a flexible neck, adjustable beam width, adjustable light intensity, and I find it’s very easy to adapt the light to the task I’m doing that day and the existing light conditions. The heavy base means that it is nice and stable even when my sewing machine is vibrating the desk! 

The light itself creates a beam or pool of directed light as opposed to a soft ambient light which makes it ideal for sewing and crafting. The lights use Daylight Wavelength Technology to ensure that the colour spectrum represented is as close as possible to natural daylight. This means for sewing that colours are represented accurately and you don’t have to worry about mismatches in the light of day. 

One thing I will say, and you know I never shy away from this, is that they do represent an investment. The High Definition Light is £349.99 which I know can seem like a lot, particularly in the current climate, however it will last for a very long time. The lights are fully manufactured in Britain(just up the road from me!), they are low heat, low energy, and have a 5 year warranty, plus they have payment spreading options through Klarna (read on for a very helpful discount code!). It is an investment but it’s an investment in your sewing and provides more opportunities for you to sew whenever works for you not just when the stars align and you have time, space, and enough daylight to sew by! 

What Do I Actually Use My Serious Light For?

I first started collaborating with Serious Lights back in 2021 when they sent me the High Definition Light and, as always, I have a trial period before I start promoting anything. Honestly? I’ve used it every single day since. I’ve used it to sew some of my most complex makes like my graduation outfit where accuracy and attention to detail was crucial, I’ve used it to help me hand sew and thread needles, I’ve used to sew at 10pm or 6am so I can get some sewing in before work, I even wrote half of my MA thesis using it as I work at unconventional hours. So I have absolutely no hesitation recommending this light to you. 

As this is a review blog, here are the main areas I would say it helps me with:

  • Unpicking – Particularly on woolly/fluffy fabrics, darker fabrics, or projects where the thread and the fabric can be indistinguishable e.g. working with lace. I used to have to wait to unpick until the daytime so I could actually see what I’m doing but now I just use my serious light and focus the beam on where I am working. 
  • Hand-sewing – I used to get all tied in knots with hand sewing but I find having a focused light helps me not only keep track of my thread but also I find it much easier to monitor the quality of my stitches without getting a headache. 
  • Working with dark fabrics – This is a big one for me because I work with a lot of dark and thick fabrics at this time of year so I need my light to make sure my fabric is the right way around, I’m sewing the right section, or snipping the right seam!
  • Threading Needles – This is a classic, it’s just ludicrously easier to thread a needle with my Serious Light on, I can actually see what I’m doing and it makes the whole process stress-free. 
  • Colour Matching – No one wants to wake up, look at their sewing from the night before and find that your matching thread is actually a contrast! With their proprietary Daylight Wavelength Technology the Serious Light doesn’t only light up your fabric but it shows the true colour. This is brilliant for colour matching threads, linings, and notions. It also gives you a true picture of what you are working on and means that you can sew anytime of day and the result will be the same. 

Serious Lights are fantastic for sewing, particularly the high definition light. The weight and stability makes it a sturdy sewing companion while the variable light levels and intensity mean that you can adjust your light for whatever weather or time of day you are sewing. 

If you would like to treat yourself to one then you are in luck! Serious Lights have very kindly given me a discount code for you folks. Use code ‘SR470’ to get yourself £100 off the High Definition Light + FREE Delivery! So if you want to treat yourself for Christmas don’t forget to use the discount code and get yourself a little discount on the website

Progress Not Perfection: My Sewing Philosophy

As I sit writing this I have ginger biscuits in the oven, a recipe Ive spent years perfecting, I’m wearing my first pair of Hudson Trackies with a hole that needs repairing, because in the time since I made them I’ve learnt about the existence of triple stitch and its usefulness in trousers, and my first Tammy Handmade Naya Tshirt with slightly dodgy neckline binding, which if I made again now I would ensure I stretched consistently the whole way around. What is the common theme? In order to become proficient in a skill you have to practice it. The first thing you make, write, create, is rarely perfect.

I can make cornish fairings with my eyes shut because I grew up making them with my grandma. Decades of practice have led to a skill I don’t even think about anymore. However along the way there have been burnt batches, oddly shaped biscuits, in correct mixtures, as I’ve honed the skill. Not only is that okay but it is expected. So why don’t we feel the same way about sewing?

Recently I’ve seen a lot of people talking about how much clothing is being ‘churned’ out by instagram sewists. How people are creating badly made garments simply to keep up with the demand of social media sewing. While I’m sure there are some people who attempt to keep pace with algorithm, I think the reality is more simple.

Sewing is a hobby. It is a skill. If it takes 10,000 hours to truly master a skill, then chances are you’re going to be doing a lot of sewing and learning a specific skill once then moving on isn’t going to cut it. You have to do hundreds of zip, thousands of button holes, miles upon miles of under stitching and even then you are probably only an eighth of the way towards mastery. Every crafting hobby involves making something whether its pottery, quilts, loaves of bread, or dresses, and every time you make something you get better.

The fact is that sewing isn’t just a means of creating clothing, it is a hobby and a skill. That means you are going to churn out some god-awful garments in the process. You will insert sleeves backwards or inside out. You will accidentally cut a hole in your almost finished garment when grading a seam. You will accidentally catch part of your garment in a separate seam and want to throw the whole franken-mess of a project out of the window. And at the end of it all you may not even like what you made, but that is okay. You will have learnt something. It might be something as simple as don’t grade seams on a black garment in the dark (yes I have done this exact thing) or that pressing darts up rather than down provides a better shape for a larger bust. You might learn something more substantial such as how to shrink the raw edge of a circle skirt to sew a curved hem or how to sew a welt-pocket.

By placing perfection above all else, not only can you lose the raw creative energy that is so much part of sewing but also you put a lot of pressure on yourself not to put a foot wrong. I experienced this recently while making my Jasika Blazer. I started it back in December and I was merry stitching away until I reached the section on welt pockets and I was stumped. I watched tutorials. I had a go on scrap fabric. But none of it would translate in my head to the blazer in front of me. So I left it on the mannequin until two days ago when I decided that enough was enough and I just did it. Now those pockets are awful. They are truly horrendous. BUT they exist, they function, and they may not be perfect but it’s progress. Now I’m out of the mire of indecision and terror of ruining my blazer, I feel much more relaxed.

Don’t get me wrong here, I’ve made loads of mistakes in the last two days and this blazer will almost definitely end up as a wearable toile rather than the finished article but that is okay because I’m enjoying the process again. I’ve had so much fun just having a go knowing that every mistake I make is a lesson I’m learning. I like to know why I have to do something a certain way and the best teacher for me is doing it wrong and finding out exactly what that is wrong.

There are so many things you should do and shouldn’t do. You should make a toile, you should finish your raw edges, you shouldn’t use your fabric without pre-washing, you shouldn’t sew over your pins, but really what it comes down to is ‘what do you want out of sewing?’ Personally I want to learn, I want to relax, and above all I want to have fun, and the fantastic wardrobe I’m building is merely a by-product.

So today I want to encourage you to go through your ‘Work In Progress’ basket and think about progress not perfection. What tiny thing, or even big thing, can you do to make progress on a project you are stuck on? Can you iron on some interfacing? Can you do a quick rolled hem? Can you overlock the raw edges so its ready for the next big step? Remember it doesn’t have to be perfect. It doesn’t even have to correct! You can always unpick it later. It just needs to be a step forward.

Now if anyone wants me for the next month I’ll be finishing works in progress before starting my new adventure in September!

Step By Step Guide To Sewing French Seams

At the moment I am up to my eyes in patterns tests, I have about four to complete in the next three weeks. The upshot of this is that I can’t really share what I’m sewing… HOWEVER! One of these patterns tests is a french seamed garment and it got me thinking that I really should write up and film a french seam tutorial.

Along with threading an overlocker, French seams have a bad reputation for being awkward, difficult, and generally causing issues. French seams confuse a lot of sewists out there and I get it because quite frankly they are counter intuitive and if you get them wrong you can’t really do them again.

Despite that they are actually my favourite seam finishing technique and you can use them on any project with lightweight fabrics. The only stipulation it that you need to be able to iron the fabric or at least press it down with a clapper.

To help other sewists love french seams as much I do I’ve put together a handy guide to take you through the process step by step!

Step By Step Guide To French Seams

Step 1: Workout your Seam Allowance split

Step 2: Sewing First Seam WST

Check your seam allowance and work out how you are going to split it if not indicated in the pattern. For this pattern I am using a 2cm seam so we are sewing both seams at 1cm. However if you are working with a standard 1.5cm seam then I normally split it as 1cm then 0.5cm(in line with the inside line of the presser foot.

Step 2: Sew your first seam

Sew your first seam with the fabric Wrong Sides Together. It feels very strange but you should end up with your seam on the outside of your garment.

For my garment this seam will have a 1cm allowance but remember to check what you should be working to on your project.

Step 3: Trim off the excess

Trim the volume of the seam down as close as you dare to the stitching line. Be very careful when doing this that you don’t actually snip the stitches or catch any of other sections of the garment in your scissors.

Step 4: Flip the seam so that the fabric is now Right Sides Together

When you do this make sure the press the new seam so you get a lovely crisp edge and secure what will now be the inner line of stitching enclosed in the second seam.

Step 5: Sew your second seam enclosing the first one

Sew your second seam as you would usually with the garment Right Sides Together. Again remember to check what seam allowance you should be using for my project its another 1cm seam allowance however yours might be 0.5cm at this stage. Remember that this seam should completely enclose the first seam. If you have fabric from the first seam poking out through the second seam then you need to trim the first seam down even further.

After sewing give your seam a good press. When you turn your garment through to the right side it should look like a perfectly normal seam with nothing poking through.

Secrets of French Seaming

  • You can split the seam allowance however you like! You don’t have to do it in the exact measurements supplied by the pattern as long as the seam allowance amount is correct at the end. I tend to use the 2/3 1/3 method. E.g. When I’m doing a 1.5cm french seam regardless of what the pattern says my first seam is 1cm. Then I trim and flip and my next seam is 0.5cm.
  • Iron at every stage! It helps set the stitches and secures every stage making an overall stronger seam.
  • French seaming sleeves is not nearly as complex as you think it’s going to be. It’s award but I promise it isn’t difficult and the result is brilliant!
  • When working with chiffon or similar very lightweight fraying fabrics I strongly recommend finishing the edges within the seam so there is less chance of them fraying and ripping open. E.g. I stitch together Wrong Sides Together, trim, then I finish what is left with a zigzag stitch, then I flip through and sew the final seam with fabric Right Sides Together.
  • Move all the other fabric out of the way before trimming your first seam – this is the number one way to cut a huge hole in your beautiful new make completely by accident. The worst thing is? You won’t even realised you’ve done it until the end when you turn your new make right side out.

That is my tutorial for beautiful French seams! My biggest piece of advice? Don’t overthink it. Take it slow and follow the steps and you will get there.

French seams are my absolute favourite finishing technique and as I’m doing a lot of them today it felt like a nice to time to write about them. I don’t write up tutorials very often so if you enjoyed this blog and want to see more then please do let me know in the comments and share it with your sewing friends.

Make Do And Mend: Looking After Your Me-Made Wardrobe

When I made the choice to reduce my consumption of fast fashion, I also signed up to another pledge. I committed to looking after my existing ready-to-wear wardrobe.

My focus has shifted from trends to joy. Joy of fashion. Joy of garments. Joy of sewing.

I want to achieve something with my me-made wardrobe that many fast-fashion brands do not, and make my garments last.

Fast fashion brands like Shein, Pretty Little Thing, and Boohoo churn out poorly made clothes designed to be worn, wear out quickly, and throw away after six months so that you can buy into the next big trend.

Each piece of clothing is a stepping stone to the next piece and very little consideration is given to the longevity of our wardrobes.

With me made garments we invest time and energy. We put care into every step and create something that we want to wear and we look after it.

However sewing doesn’t mean throwing out your existing ready-to-wear wardrobe, I have RTW clothes that have lasted over 10 years with careful washing and conscious approach to their care.

Caring For Your Wardrobe

A quick test to see if you look after your wardrobe. Do you know what these symbols mean? Chances are you’ve seen them as you hang your clothes out or briefly as they disappear into the washing machine. I know that I didn’t understand them for years. Sometimes I still get confused!

These symbols describe how you should care for your clothes and yet most of us don’t understand them or just don’t read them. However they are the key to caring for our RTW wardrobes. To tell us what to do and crucially what not to do! What temperature to wash at. Whether or not it can be tumble dried. Even sometimes what temperature your iron should be.

Following these symbols prolongs the life of garments and therefore helps us to consume less. This article is not here to berate you, I’m not trying to tell you off because honestly who has time or energy for complex garment care.

When we do get to the point where mending is required, when a button falls off, a zip breaks, seams fray and split, we are more likely to throw the garment away or take it to charity than we are to fix it. The reality is that that is how we’ve been conditioned to engage with clothing and the fashion industry. But we don’t have to. We can choose to look after our clothes properly, we can even refashion our clothes to make new garments we will love for longer.

The Joy Of Mending

Put your hand up if you honestly like mending things. Whether thats for yourself or for others. No? No takers? Exactly, mending is a sewing chore.

It’s not fun, it’s time consuming, irritating and frankly most of us would rather be doing anything except sewing a button back on. Which makes it even more annoying that mending is a crucial skill and one that will make your clothes last almost forever.

Regardless of how boring mending can be it truly is a superpower held by sewists and dressmakers and one we must use. We can do mending easily ourselves if we put our minds to it. We have the knowledge to insert a new zip or fix a fraying hem. If you’re lucky you’ve got a sewing machine like mine that will attach buttons for you with no hand sewing involved!

My Top 5 Garment Mending Tips

  1. Don’t leave it. If you notice a seam starting to fray, a button becoming loose, fix it then and there.
  2. For patching tiny holes in garments or reinforcing newly sewn-up rips try adding a bit of iron-on interfacing
  3. Don’t be scared to refashion. If you’ve got a garment that has a huge rip or hole, why not considering making it into something else so it can return to your wardrobe.
  4. Consider visible mending with embroidery. It’s a fun way to customise a garment and add a bit of personality.
  5. Set aside one day a month to tackle the mending and refashion bag. Grab a cup of tea, stick something on the radio or the TV, and get sewing!

10 Ultimate Truths of Sewing

Whether it’s the white knuckle ride of bobbin chicken when you know you have none of the matching thread left in the house, the infuriating second side of your zip, or the soul crushing realisation that you’ve just cut a huge whole in the middle of your garment when trimming a french seam, we’ve all been there.

One of the wonderful things about the sewing community is that we all have these experiences. Whether you’ve been sewing for 5 days or 25 years you will have to unpick something, you will attached a sleeve the wrong way around, and you break a sewing needle so badly it’s left looking like a paperclip (just me?). These things happen.

As an experienced sewist I’ve learnt that there are certain fundamental rules of sewing and it is wise to prepare. For example, never buy only one spool of a very specific thread colour, get a couple; check your bobbin level BEFORE starting a very long seam; and never ever put your seam ripper away. In the same way that when you call someone from IT when your computer breaks only to find it works when they are stood there. While your seam ripper lies next to you everything is fine. The minute you put your seam ripper away, you send a cosmic signal to the universe asking to unpick half of your garment and put a sleeve in wrong side out. It’s pure hubris and I have to stop doing it.

To get back into blogging I thought I would pull together my list of ultimate sewing truths, the rules at the heart of the thread-iverse. I should say, there will be someone who takes this too seriously so for the sake of a small minority(who always make their toiles), this post is based on my experiences of sewing and is also just a bit of fun.

10 Ultimate Rules of Sewing

  1. Even the most accomplished dressmaker has to unpick things
  2. The one time you don’t follow the fabric allowance on the pattern is the time you will actually need it.
  3. One side of your zip will be perfect first time, the other side will take 17 tries
  4. It is easier to get a degree in Nuclear Physics than it is to work out the correct overlocker tension first time
  5. No one actually changes their sewing machine needle every 8 hours
  6. If your thread is going to run out, it will do it in the middle of topstitching
  7. No matter what is in your wardrobe, you will find yourself sewing a new dress hours before you have to leave
  8. Toiles are both incredibly important and stunningly dull, as all the most useful things are.
  9. Whenever you think you’ve sewn something perfectly first time, you will find your bobbin ran out at the beginning and you have to do it all over again
  10. Always get two more buttons than you need. An extra for when you inevitably miscount the number you needed in the first place and one to go in the buttonhole foot after you’ve attached the rest without thinking.

This very silly and fun post signals that I am indeed back to blogging regularly. I will write a proper life update so you lot can know what I’m up to, where I’ve been, and where I’m going. But! In the meantime, let me know what you would add to this list in the comments below! I’m considering having it put on a tea towel.

New Year, More Sewing: My Sewing Resolutions For 2023

Well here we are again, a new year begins! I’m not going to say that ‘I’m back’ as in my experience any post that starts like that is cursed not to be followed up for 6 months but I will acknowledge that I have taken a break from blogging. The break roughly coincided with me writing my MA dissertation followed by my busiest work period of the year so entirely understandable but still I have really missed blogging.

As I write this I am sat on the sofa watching the original Mission Impossible (great film) and attempting to relax. In the days leading up to New Year I’ve been cleaning, tidying and rearranging my sewing space but today I just needed a moment to rest. Tidying the sewing space and moving the furniture around has been a great way to give the space a new lease of life as well as thoroughly evaluate what is still relevant to my sewing and what needs to exit stage right, as it were.

Last year was an interesting one for my sewing it has to be said. Recently I joined in a fun instagram trend and put together a reel of everything I have made this year. It showed me just how much I’ve grown and developed my sewing skills. 2022 saw my first trips abroad since I got back into sewing properly and allowed me to do some very fun holiday sewing. My first crack at swimwear was a massive success and I really enjoyed putting together me made holiday wardrobes for each trip.

The second edition of Sew Yellow for Endo raised £1075 for Endometriosis UK, 4 brave sewists spoke about their experiences with Endometriosis and over 150 sewists took part. Together we turned instagram yellow for the day and for that we should all be so proud. Thank you all for your time and effort and I can’t wait for Sew Yellow For Endo 2023! If anyone wants to sponsor please do get in touch as planning is starting this week.

2022 also saw collaborations with pattern brands such as Cashmerette and Tammy Handmade, Lush Cloth gave me the chance to be one of their guest bloggers, Orya Textiles gifted me some incredible fabric and helped me achieve one of my make nine, and I got to collaborate with fellow bloggers and vloggers in the sewing community, trying new patterns such as the Sicily slip dress with Tamlyn from Sewn on the Tyne and the Allie Olsen Highland Wrap Dress with Sew Do It Emma. I learnt so much from these collaborations and I would like to thank everyone I worked with in 2022 for their patience with me and my unpredictable work schedule!

So what’s next for So What If I Sew? 2023 is my year to shift my focus from work to my personal life, my relationships, my hobbies, and my habits. I hope to have lots more opportunities to collaborate with my fellow sewists and I’ve set myself another Make Nine challenge which you can hear all about over on YouTube, but I’ve also set myself two goals for my own sewing.


Sewing For All Seasons Not Just Summer

My handmade wardrobe is definitely more skewed towards the summer. I think mainly because summer fabrics are much easier to sew with. Cottons and viscoses are easier to work with and in my experience summer patterns come together much more quickly.

However this has left a gap in my wardrobe. I have very little outerwear, I have very few cosy makes, and almost nothing I’ve made in any stretch/jersey fabrics which tends to be what I wear from October to February. In the winter I’m all about jeans, heeled boots, cosy jumpers, and long sleeved tops, and the fact is that I am now able to sew quite a few of those items.

So this year I want to challenge myself. I’ve put the Atelier Jupe Alex Coat on my Make Nine, I’m also going to dive into a new t-shirt/3/4 length sleeve top pattern later today, and I have some incredible purple denim that I’m working up the courage to sew with.

In 2023 we will be going on a cold holiday for the first time in a while and we will be headed to Prague so the cogs are already turning trying to figure out which bits of my me made wardrobe will be suitable and what I can get made before we go! I don’t know about you but holidays can be great motivators to crack through some projects and get them into the wardrobe rotation.

So the goal for this year is to turn my attention to seasonal sewing and consider what I wear when and whether I can I can plug any seasonal wardrobe gaps with me mades.

I Need To Spend Some Time Understanding My Own Style

One of my first goals for my sewing was to create workwear I loved and felt confident in and after the last year I can put my hand on my heart and say I have achieved that goal. Now its time to zoom out a bit and think about what I like wearing. This year is all about work/life balance for me and as part of that I want to separate my work wardrobe from my personal wardrobe and make sure I have clothes that reflect my personality.

Back in October my friend Louisa and I did a massive clear out of my wardrobe and got rid of all the things that I no longer wear because they aren’t really my style. Now going forward I’m trying to figure out what my style is. I know what colours I like wearing which is a good start and I know that my style definitely changes between the seasons, I’m not a Pinterest girl with one year round aesthetic and colour palette.

In 2023 I’m going to experiment more and think about what clothes make me feel most “me” whatever that means and build a wardrobe for my personal and social life that make me feel as confident as my workwear wardrobe does. The measurable, because for me there has to be a measurable, is to finish the year with a mood board for each season of clothes that I love wearing and make me feel like me.


Above all I want to make sure that this year I take the time to enjoy the learning process as well as making garments that I want to wear. Currently I am working on the Closet Core Jasika Blazer and whilst it is difficult it is also an incredible learning curve and I feel so proud when I complete every step. I want a mix of quick win projects to help sustain my motivation and challenging projects that make me work my brain and on the completion of which I feel exceptionally proud.

So here’s to 2023 a year of creativity, connection, and continued sewing!

My Week In Sewing: Me Made Wardrobe and Upcoming Sewing Plans

Hello everyone! This week you join me on the sofa cutting out patterns and giving myself a home pedicure with one of the Fast and Furious films in the background. Its been a busy couple of weeks with very little sewing if I’m honest. But then that is the point of these blogs, to be honest about my sewing! 

Part of the reason I’ve done very little sewing is that last weekend I took a trip up to Birmingham to visit my school friends who I’ve not seen in forever. It was lovely to get a weekend away after a busy week and nice to visit a city for the first time! I was very good and didn’t visit any fabric shops instead we just had a wander around and went for dinner and drinks then brunch on the Sunday morning. Although I couldn’t get any sewing done, it was lovely to take a me made wardrobe on tour. Since my me made wardrobe has grown I actively enjoy packing for trips. Trying to find new styles and looks, combining new garments, and really revelling in the joy of making and wearing my own garments. It was a scorching weekend so I pulled out my old favourite, the McCalls #M8090 made in this beautifully pattered viscose paired with my new denim jacket (left) as discussed in my last blog! Then  for brunch it was a little cooler so I brought out my McCalls #M7531 striped jersey dress with the same denim jacket(right). Packing for one night is always challenging and both garments roll up very small so are ideal for the backpack. 

Although covid and lockdown allowed me to advance my sewing endlessly and create lots of beautiful garments, it also robbed me of a chance to actually wear any of them. Now that we have the freedom to socialise and travel I am really enjoying styling my me made wardrobe. I had the wonderful sensation the other day of looking into my wardrobe and seeing that well over half is now me-made. I have also started a new system of organising my wardrobe using colour. Not only is it visually very appealing when I open the door, its also making it much easier for me to find garments. I’ve discovered that when I’m thinking about outfits I tend to choose a colour first and then a style or combination. I think that’s the trick to sorting your wardrobe, its finding a system that works for you and sticking to it. 

The other reason I’ve managed very little sewing is because almost every night this week there has been a points failure at Marylebone so I’ve been late home every night. Even on Thursday night when I was lucky enough to go to the ballet with Adam’s mum and sister (we saw swan lake it was amazing!!) I got to the station for the 11pm train and again we were 40 minutes late leaving meaning I got home past midnight. Taking travel difficulties into account, plus the fact that every spare moment is being spent on my MA dissertation, you can see why not much sewing is happening. I do have lots of sewing I want to do though. The inspiration is definitely there, I’m just time poor at the moment. 

So! Lets talk about what I am sewing and hoping to sew. First up is my next ambassador project for Cashmerette, I can’t talk about the pattern but I am hoping to manage a trip down to town this afternoon to pick up the fabric. It will be a super quick sew, I just don’t have any suitable fabric in my stash. I will reveal that it’s a stretch pattern and I so rarely sew with jersey that I am breaking my fabric ban because I genuinely have nothing appropriate. I also need to buy some thread so I can hem a dress, and I will also need some buttons. The deal is, I write 500 words on my lit review and I get to go into town! 

Next up are two slip dresses. One is my next Friday Pattern company slip dress, I’m making the long version in a size smaller, and the other is the Jessica Slip Dress from Tammy Handmade which I’m going to make in a Black Cupro. I’m planning to do a youtube video about all three slip dress patterns and give feedback on how they all compare and fabric suggestions etc. I’m hoping that will be ready for the Jubilee Weekend so keep an eye out if you subscribe to me on YouTube!

The final active project I’ve got at the moment is my Chalk and Notch Wren which I’m making in this gorgeous red viscose from Stitch & Ink! I’ve cut it out, I just need to get going with it. I think I’m going to have a go tonight so I at least get some sewing time in this weekend. 

As you can see I’ve got lots I want to do, lots I’m excited about sewing. I’m just struggling for time. This morning is the first time this week I truly feel like I’ve had a moment to myself to just relax. Then I’m off to write more of my dissertation and then hopefully (fingers crossed!) a trip to town in the sunshine. The final thing I’ve been working on you will see tonight! My guest blog for Lush Cloth will be going live and I’ll finally be able to tell you all about one of my favourite new makes that has been ruling my work wardrobe. 

It wouldn’t be a My Week In Sewing blog unless I did my pattern and fabric highlight. As always these are in no way sponsored, they are just fabrics and patterns that I’ve seen this week and am secretly coveting!

Pattern: This week’s pattern of the week is the Carolyn Pyjamas from Closet Core. I’ve been thinking about making myself a super light pair of summer pyjamas for a while and I think the Carolyn is the dream pattern! Now I just need to find a suitably light fabric for when its ultra hot.

Fabric: My fabric of the week is not from one shop but all week I’ve been dreaming about White Broderie Anglaise! I’ve never sewn with it but I’ve always loved it. I’m still looking for the perfect one, Sew Sew Sew have this in coral and there is talk it may be coming in white in July! Until then I’ll be swishing around in Broderie Anglaise in my dreams.  

That’s all from me this week, but have a great week everyone and hopefully next week I will have lots of beautiful things to show you!

My Week In Sewing: Slip Dresses & Summer Sewing

Hello everyone, here we are back again! Honestly I missed last week because of a combination of the Bank Holiday making me forget what day was Sunday and my final MA assessment (apart from my dissertation) was due on Tuesday so I was writing all weekend anyway. Thus a Sunday missed but not much sewing week before last so no harm no foul.

This morning I spent a lovely couple of hours sat outside in the sunshine, basking like the salamander that I am, reading, and starting to think about my summer holiday wardrobe. I have not actually been on a hot summer holiday since I started sewing more seriously. So there is a lot to think about. In July I’m going to Menorca for 4 days with one of my best friends in the world, we are going to sunbathe, read, drink by the pool, and thats pretty much it! We both seriously need a break and we have the same heat tolerance so its perfect. Now I have begun the very exciting task of considering my wardrobe. Its not that long a holiday but I want lots of options and ideally I want everything except my existing swimwear to be me-made. This morning I sat out and read in my McCalls #M8090 dress and it has definitely earned the first spot in my suitcase. I made this dress last summer and I loved it from the second I put it on, its light weight, floaty, a nice length and but still covered enough to protect your arms and chest from sunburn which I definitely need. I’ve got some other ideas but nothing concrete as of yet but I am definitely going to film a vlog of the final wardrobe when I’m back from holiday.

I’ve been quite quiet over on instagram and on my youtube community tab recently, not that I can really get to grips with that last one I’ll be honest… My quietness is not due to lethargy but actually because I’ve been doing some secret sewing that I can’t reveal to you just yet. For one garment the pattern has not yet been released, for the other I’ve got a guest blog to write before I can show you the make publicly but, spoiler alert, I love them both. Something I can tell you about however is the Butterick pattern I’ve been chipping away at for the past few weeks (pictured on the left). The skirt finally went on last night (hooray!) but there is still a lot of work to do on this dress. The fabric is so slippery that it is astonishingly irritating to work with and I’m having to baste everything to get the right placement. I’m not kidding, pins just fall out of this fabric! However I do have a time limit so I’ve got to get on with it. In two weeks time I am going to the Royal Opera House to see Swan Lake with Adam’s mum and sister and ideally I would like to wear this dress. However there are other options in my wardrobe if this one tries my patience too much.

Last weekend I was also finally able to reveal both my Sicily Slip Dress(left) and my Saltwater Slip (right). It’s so great to have them both out in the world now and feel free to head over to my youtube to find out how I got on making them both. The Sicily has grown on me massively, particularly since I cut half of it off but the Saltwater? I hate it. Or at least I hate the one that I have made. I’m not going to give up because I really do like the pattern, instead I’m treating my first endeavour as a wearable toile. This time around I will be making the longer version in a size smaller in a different fabric and adding the waist ties. I’m also considering a second Sicily but just as a top this time because I think it would look amazing tucked into jeans.

As you all know, I have a penchant for short dresses both in the summer and the winter. Now that my slip dresses have been revealed, the genre of slip dress fashion is open to me and I’ve been considering how best to style them within my wardrobe. I am trying to buy as little as possible and curate a beautiful me made wardrobe, however when I see a piece that I love and will keep for many years I think its worth buying it. What I am trying to train myself to do is to do less impulse shopping. For example, yesterday when I was in London I tried on the most incredible M&S denim jacket embroidered with daisies. I loved it when I saw it on the mannequin, I tried it on in the changing rooms and realised then that it would look amazing with my Sicily slip dress, my white trainers and a pony tail for a more casual summer look.

However sometimes shopping in London specifically can make me way more impulse prone that I am usually so I resolved to think about it. I left the store and 5 minutes into my bus ride to the station I had managed to think of about 8-10 outfits which I wear in the winter that could easily become summer outfits with the addition of this jacket. By the time I was on the train home I was utterly bereft that I had not bought the jacket. I talked it through with Adam, I looked at my wardrobe, I considered if I might find something else better, I um-ed and ah-ed all morning but finally decided on mature consideration to order it online today.

Although it is spending money which with the cost of living crisis I’m really trying not to do, I feel that a proper denim jacket is a good investment for my wardrobe and something I will have for a very long time. I had one as a teenager for 4/5 years before I grew out of it and i wore it constantly, since then I’ve not had one but I have felt the lack of it in my wardrobe. So I have made an investment in my wardrobe. That was the theme of yesterday because I also decided to go and get a bra fitting for the first time in 4 years and also invested in two new bras that fit me. What with that, the jacket, and a little bit of summer fabric shopping at Stitch and Ink, I’m on a spending money ban until my holiday in July!

However thanks to me small shopping excursion I do now have some exciting fabric plans my long saltwater in a black ditsy floral viscose, a wide check gingham version of my Cashmerette Roseclair Wrap Dress, and a mystery red dress for an engagement party we are going to at the end of July. I should point out that the dress is only a mystery because I can’t think of a pattern just yet rather than it intentionally being a mystery. It will have gathers, It will be floaty but other than that I have no idea. Suggestions are very much welcome in the comments below.

One thing I did want to talk about in this blog is Me Made May. Last year I took part in Me Made May by wearing a me made garment everyday and posting a picture on instagram. I felt that it really helped me to get to know my wardrobe better. This year I’m going a different way. The mending pile in my house has now become a mending bin bag and its got to be dealt with. So this month my focus is going to be on mending and caring for my existing wardrobe. I’m hoping to film a mending vlog when I have time and I’ll do a post at the end of the month to say how I got on but other than that you probably won’t see a huge amount from me about Me Made May. Apart from anything I don’t want to procrastinate from the mending by posting about it! But I am taking part, just in my own way.

This week’s fabric of the week comes is a deadstock viscose from Rainbow Fabrics Kilburn that I am absolutely in love with! I saw this green fabric no fewer than 5 times on different people when I was in Covent Garden yesterday and it looked stunning. I’m not normally one for bright green but this fabric has got me sorely tempted!

This week’s pattern of the week is the aptly named Jessica Slip Dress from Tammy Handmade which is the next slip dress on my horizon. I adore Tammy’s patterns and can’t wait to get stuck into this one. It might even be a candidate for my new red fabric!

Thats all from me this week but can’t wait to catch-up with you next weekend when me and my me made wardrobe will be going on a little road trip up to Birmingham to see an old school friend of mine!

My Week In Sewing: Holidays, Bomber Jackets, and Summer Sewing

Hello everyone and welcome back to the So What If I Sew blog! We are back for another ‘My Week In Sewing’ except technically it is two weeks as last weekend we were away on holiday. It’s been an exceedingly busy two weeks and I have been really looking forward to sitting down on my sofa with a cup of tea and taking a moment to reflect and write this blog. As we were off work from Friday to Thursday and actually away Saturday to Tuesday, the weeks have somewhat blurred into one so I will do my best to separate them and remember the interesting things but honestly its more likely to be a thematic blog this week!

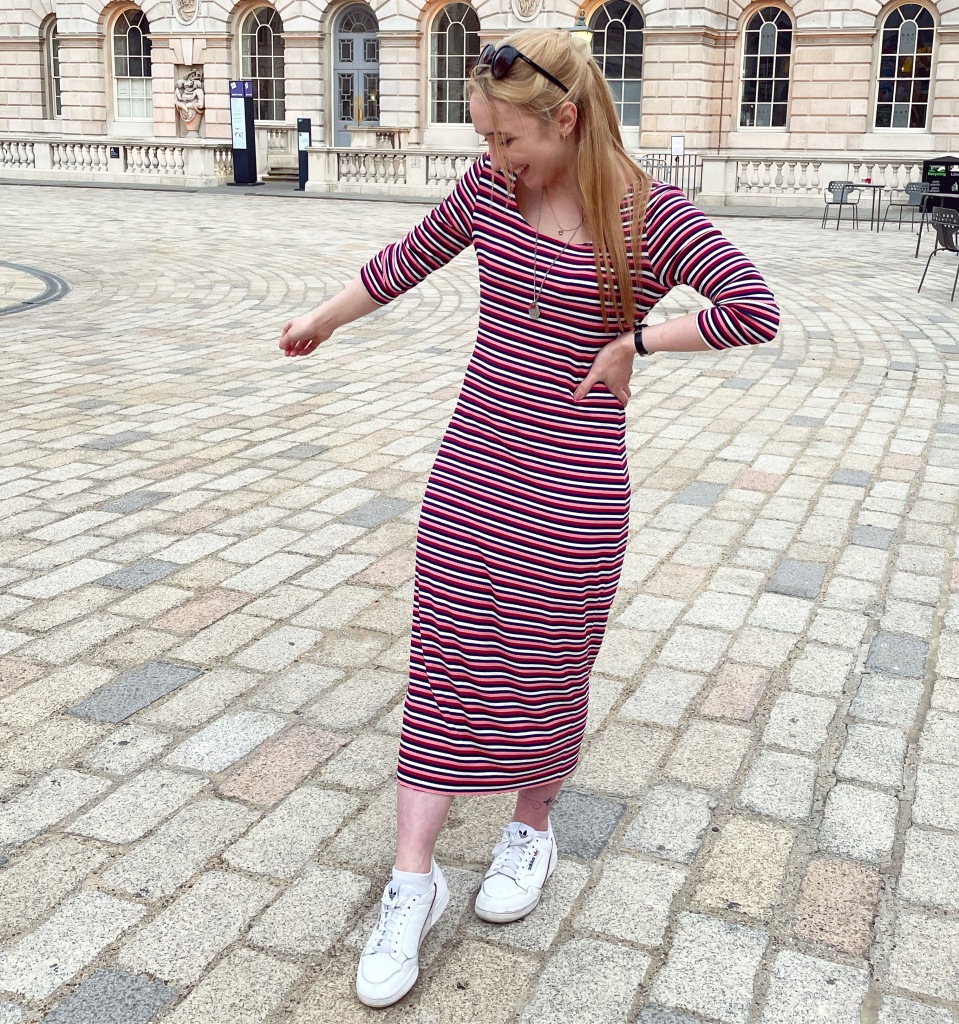
Last week(w/c 11th) I was working on an exhibition opening and I have to say my me-made work wardrobe really came into its own. I wore my second Chalk & Notch Fringe Dress – which to tell the truth isn’t completely finished( I still need to sort the sleeves) but I wore it anyway and no one noticed so I’m counting that as a win. Then for the night of the private view I got my favourite Nina Lee Portobello trousers out – stylish, elegant, and space for two phones and an epi-pen in the pockets and a radio on the waistband! Then on Maundy Thursday the sun shone and I unearthed a make I had completely forgotten about. This McCalls M7531 midi dress(shown on the left) in a super cute pink stripey ribbed jersey from Sew Much Moor. It was funny, I was sat in bed on Wednesday night trying to figure out what to wear, I was going into the office and then having dinner in London in the evening with a friend so needed an outfit to do both. Then as I scrolled through my instagram account my me-made wardobe came galloping to the rescue! This dress was made in October and the fabric is far too thin to wear in the winter so I had just sort of forgotten about it but I love that even though the fabric is lightweight, the length helps to keep you warm and cosy, I love how comfortable it is while still looking smart, and I love the colours. Now that this make has been brought to the front of the wardrobe, I know it will be getting top billing for the rest of the spring/summer.

One of the functions of these blogs is take a moment and think about my week. I know I mentioned I was starting to be a bit better about taking time for myself but this philosophy sort of dissolved in the run up to the holiday as so much had to be done before I left. However on reflection I did manage to take some time for myself before it all kicked off! I started last week with a relaxed Sunday at the hairdressers. My appointments take roughly 6 hours but I really value that time to sit and relax, to read a magazine, to get a bit of local gossip, and generally enjoy time that is truly my own. I had dinner with a friend that I’ve not really seen since January 2020 which was wonderful and on Good Friday Adam and I had a wonderful relaxed afternoon in town together. What originally was a quick admin trip for birthday presents and picking up shoes from Timpsons, devolved into a full day together in town including lunch out and some shopping for me – I managed with great difficult to stay away from the fabric shop but I am on a fabric ban until I have enough space to the fabric I currently own! I also managed to accept that I wasn’t going to be able to finish my purple satin dress in time for our weekend away so instead of stressing and beating myself up I decided to be kind to myself and I ended up buying a RTW jumpsuit(as shown below with the bomber jacket) and a red jersey dress. Both of which I adore and fit me perfectly! Thats the funny thing, when you fully stop shopping for clothes and sew most of your wardrobe, buying something RTW becomes a lovely treat. Something that happens once in a while and that I appreciate far more than I used to. I really enjoyed trying things on, thinking about upcoming makes and silhouettes but not feeling pressure to get anything just engaging with my love of clothes and treating myself after what has been a really intense couple of years.

My main sewing project last week was my first Cashmerette Club pattern, the Kimball Bomber Jacket. I used a ponte di roma jacquard for the main jacket, black ribbing for the cuffs, neckline, and waistband, and a cosy viscose for the sleeve lining. Looking at this garment both in photos and on the sofa next to me right now, I still can’t quite believe I made it. So lets talk construction details: this project involved bias bound seams, zip pockets, jacket zips, and it allowed me a first go at quilting fabric. The sleeves are made of three layers of fabric, an outer jacket layer, an inner lining, and then a layer of batting sandwiched between the two to give the sleeve some body. It also contributes to making the jacket super cosy to wear. I quilted it by eye which was tricky, as neither fabric would take chalk markings, but it worked out fine if a tiny bit messy and then literally yesterday while I was tidying I discovered that I have a quilting foot for my machine. That would definitely have helped!

The pockets were also a real learning curve, for some reason I really struggled to get my head around attaching the pocket bags for the zips, but sure enough doing just one step at a time and not reading ahead(not reading ahead helps me when I a overthinking and I just need to focus on the step at hand), the instructions guided me through and I have two excellent pockets. There are also loads of other techniques in this that were a little new to me such as bias bound seams – which I love! All in all it was a real journey and I’m incredibly proud of it. I mean…please don’t look at the inside or anything and its by no means perfect, but I am extremely happy with the result and I know its going to get alot of use this summer. I was so proud of it that I wore it out in London on the Saturday night and made Adam take photos of me against a cool black wall outside our hotel. I had a bit of a vogue moment and I regret nothing. Side note: do we love my new sunglasses? The result of over an hour trying sunglasses on at TK Maxx but I am very pleased!

The bomber jacket and jumpsuit emsemble was in honour Adam’s mum’s 60th Birthday, we had dinner with most of his extended family and then went to see Cabaret which was an absolutely wonderful production. If you get the chance to visit the Kit Kat Club at the Playhouse Theatre I thoroughly recommend it! Then on the Sunday we escaped to the countryside for a few days walking and relaxing at a country house hotel in the North Downs to celebrate our anniversary. On our way back through London on Tuesday we rounded the trip off with nearly two hours, and an ungodly amount of money, spent in the enormous Waterstones in Gower Street. All in all a wonderful weekend and very much needed! Since we got back earlier this week we’ve been trying to sort things out as between work, Adam and I being ill, my MA, and the holiday, we STILL haven’t finished unpacking the house after the move! I know everyone says that unpacking takes time but Adam and I are normally very very speedy unpackers so it is a little stressful that the flat still isn’t completely sorted. We will get there though and there really isn’t that much left to do, it just feels a lot at the moment – we shall prevail!

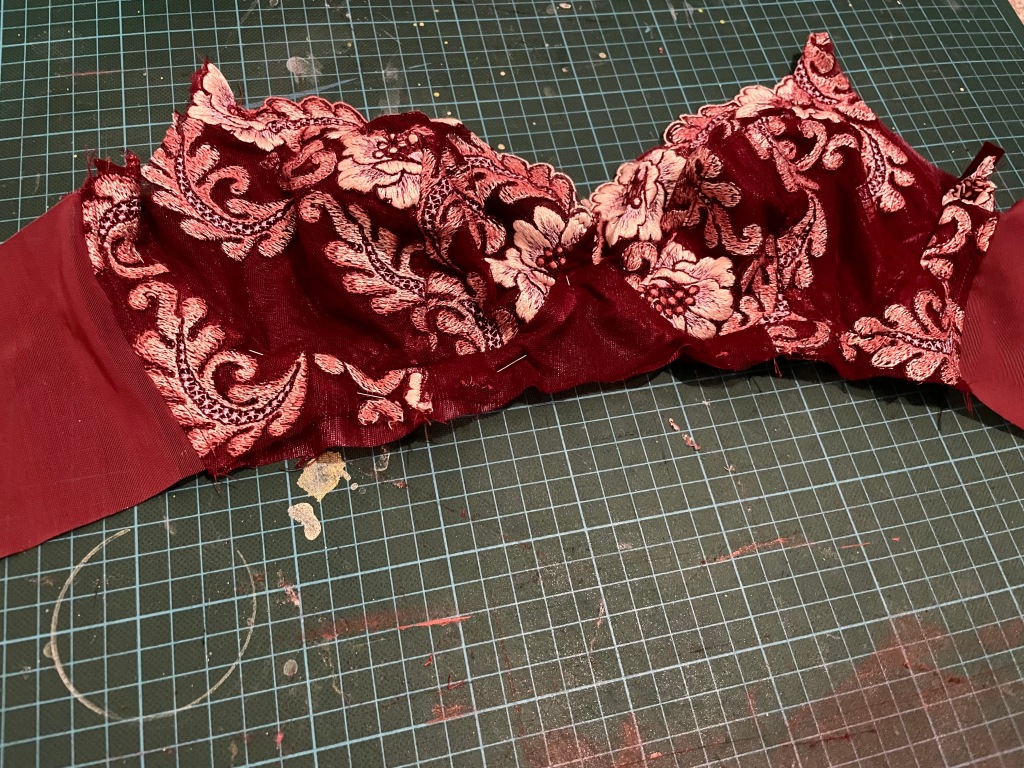
However I have had time to get some good sewing in this week! After work on Friday I got the overlocker out and finished all the seams on my white Marlo cardigan. Now I just need to decide whether I want to put buttons on it or if I’m happy with it as it is. I have also been beavering away at my Harriet Bra and I am pleased to report that I now have about 75% of an actual bra! The casing is going to be attached next and then elastic to almost every side and then I just need to wait for the rings and sliders to arrive so that I can attach the straps. Idiotically I used my original rings and sliders on my Friday Pattern Company Saltwater Slip Dress which I will be able to tell you all about next weekend. Yesterday evening I also managed a little batch cutting and cut out my next Cashmerette ambassador project – I can’t reveal the pattern just yet – and my Closet Core Pietra trousers which I’m hoping to start this week as well.

I even managed to get a vlog out this weekend! Head over to my youtube channel for updates on my favourite spring makes, my summer plans, and an update on my make nine challenge.

So its been a week (or two!) of bits and pieces. I’m sorry I don’t have anything more meaningful to discuss this week but I really do love these blogs as a way to chat to you all and give you little updates on my sewing. Sadly there will be no sewing for me today as I need to write 3000 words of my dissertation for tomorrow for my tutor to review – wish me luck! Its only my lit review and I have done a massive amount of reading and I’m also fully prepared that what I give her on Monday is very much a first draft and I will most likely edit it a further 6 times before my tutor does her second review. However there is just time to squeeze in this week’s favourite fabric and patterns!

Pattern of the Week: Absolutely loving the Cashmerette Vernon Shirt at the moment! I’m on a Cashmerette kick at the moment and I definitely fancy the idea of making a shirt with no gape and no pulling buttons!

Fabric of the Week: This Ecru Patterned Viscose from Sew Sew Sew has absolutely stolen my heart! I want culottes, I want a dress, I want a skirt, I want absolutely anything and everything in this fabric!

Anyway, I had better get on with my dissertation so thank you all for joining me again this week and I’ll see you next weekend for another My Week In Sewing!